Active Directory Filtering for Office 365 Directory Synchronisation (Dirsync)
In my last article of this series –https://www.netwoven.com/2014/09/25/moving-from-on-premise-to-office-365-windows-azure-part-3/ I discussed way to move your dirsync to a different subscription. In this article I will show how we can refine the contents that we need to sync up to Azure AD.
Overview:
Any office 365 subscription synced up to on-premise Active Directory will actually sync all users in the initial default configuration of dirsync tool. However in most cases, you would not like to see some accounts like service accounts, test accounts to appear in Windows Azure AD simply because they may me exclusively required for on-premise deployment of various products and their configurations.
Issues:
You can enable Active Directory synchronization filtering in Azure Active Directory at any time. If you have already run the default configurations of directory synchronization and then configured the filtering, the objects that are filtered out are no longer synchronized to the cloud. As a result, any objects in the cloud that were previously synchronized but were then filtered out of the synchronization are deleted by the directory synchronization process.
If objects were inadvertently deleted because of a filtering error, you can re-create the objects in the cloud by removing your filtering configurations, and then syncing your directories again.
Caution:
Microsoft does not support modification or operation of the Directory Sync tool outside of those actions formally documented. The actions documented below in this article are supported. Unsupported actions include:
Refer to the technet article for further details: http://technet.microsoft.com/en-us/library/jj710171.aspx
- Opening the underlying FIM Sync Engine to modify Connector configuration
- Manually controlling the frequency and/or ordering of Synchronization Run Profiles or changing the attributes that are synchronized to the cloud.
Any of these actions may result in an inconsistent or unsupported state of the Directory Sync tool and as a result, Microsoft cannot provide technical support for such deployments / usage of the tool.
Filtering configurations applied to your directory synchronization instance aren’t saved when you install or upgrade to a newer version. If you are upgrading to a newer version of directory synchronization, you must re-apply filtering configurations after you upgrade, but before you run the first synchronization cycle.
Requirements
DirSync is simply a pre-configured Microsoft Identity Integration Server [MIIS] installation specific for Office 365 integration located by default at the following location
- 32-bit: %SystemDrive%Program FilesMicrosoft Online Directory SyncSYNCBUSUIShell
- 64-bit: %SystemDrive%Program FilesMicrosoft Online Directory SyncSYNCBUSSynchronization ServiceUIShell
The account running the configuration need to be domain admin and also be a member of MIISAdmins local group.
Filtering Steps
There are 3 ways of setting up directory sync filtering:
- Organizational Units based, which allows you to select which OUs are to be synced to the cloud;
- Domain based, allowing you to select which domains are synchronized to the cloud;
- User attribute based, enabling you to control which objects shouldn’t be synchronized to the cloud based on their AD attributes.
A. ORGANISATIONAL UNITS BASED FILTERING
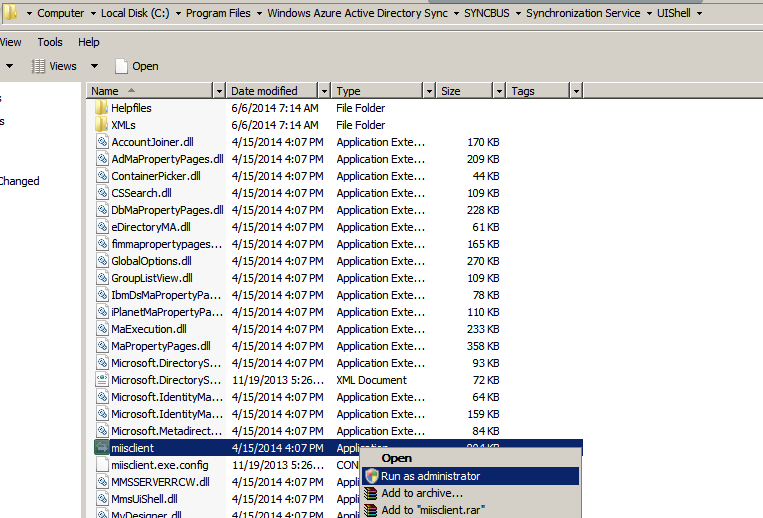
Open dirsync installation folder at %SystemDrive%Program FilesWindows Azure Active Directory SyncSYNCBUSSynchronization ServiceUIShell and run the miisclient.exe as administrator.
Click on Management Agents
Double click on Active Directory Connector

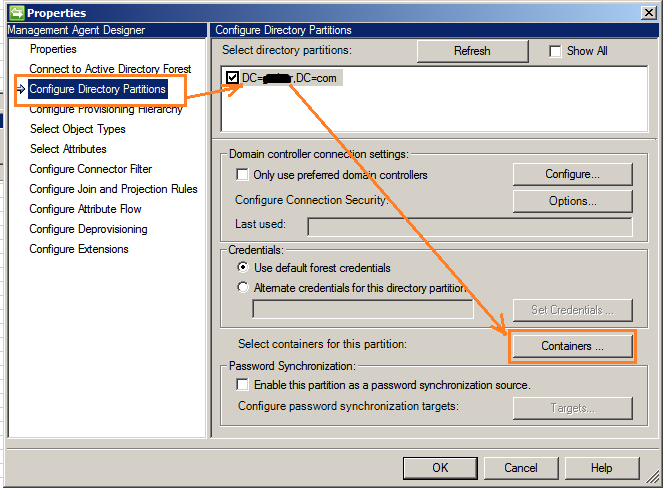
Click on Configure Directory Partitions
Ensure correct Domain is selected at top
Click on Containers as indicated below
At the prompt, please provide a Enterprise domain admin credential

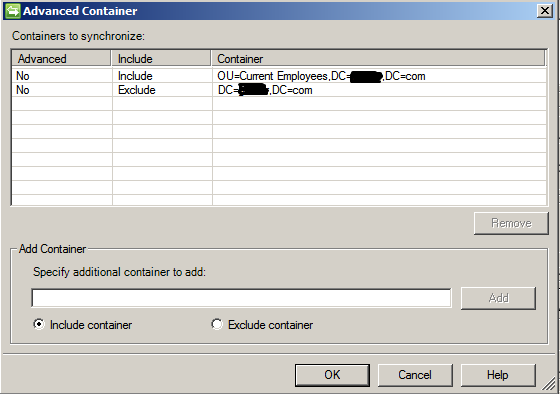
Put a Check next to the OU’s you need to sync to office 365 and leave others unchecked.
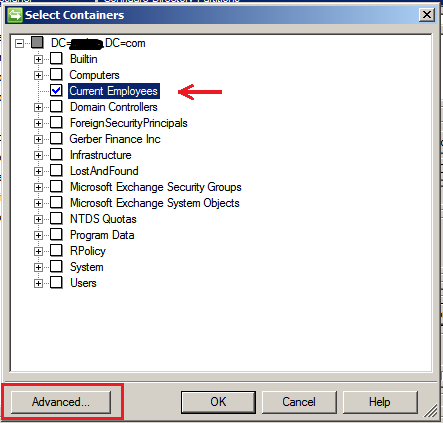
You can click on advanced button to provide additional configuration / cross check what is synchronized and what is not synchronized. Click on ok to confirm your selections.
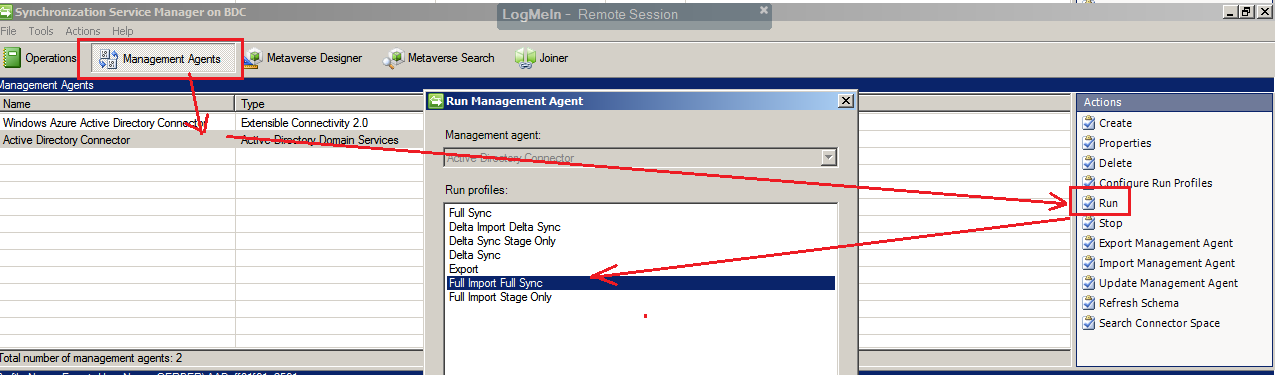
Close select container menu and go back to Active Director Container in Management Agent
Select Run and ‘Full Import Full Sync’ option in the run menu
After running the agent, please look at the statistics at the bottom
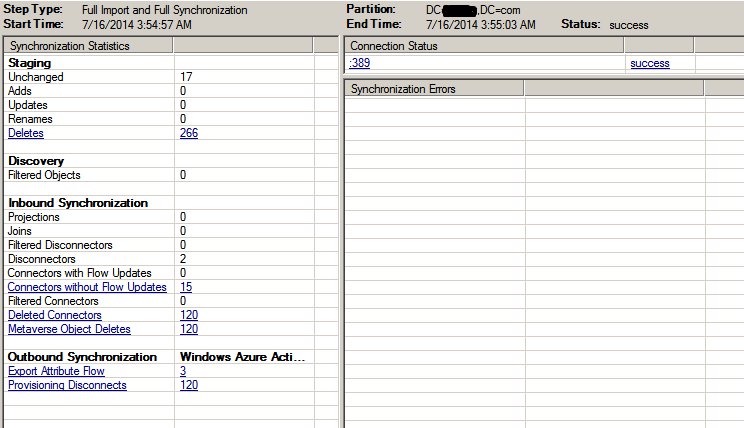
In my case, initially directory sync was run without any filter and hence office 365 had more users than needed. However after selecting the necessary OU, the agent detect deletion of some objects and some unchanged. Rest of the statistics are self-explanatory.
You are done and your office 365 will only have users belonging to the selected OU.
B. DOMAIN BASED FILTERING
Open dirsync installation folder at %SystemDrive%Program FilesWindows Azure Active Directory SyncSYNCBUSSynchronization ServiceUIShell and run the miisclient.exe as administrator.

In Synchronization Service Manager, click Management Agents and then double-click SourceAD;

Click Configure Directory Partitions and then select the domains that you want to synchronize.

Click OK;
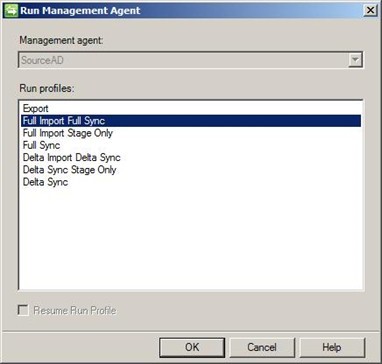
On the Management Agent tab, right-click SourceAD, click Run, click Full Import Full Sync and then click OK to perform a full sync;

Once finished, you can check the results at the bottom left corner of the window.
C. User Attribute Based Filtering
The user attribute-based filtering procedure can be applied to only user objects. Contacts and groups use complex filtering rules that are beyond the scope of this article.
Filtering out specific users requires that you update the user objects in your on-premises organization that you do not want to synchronize to the cloud. You can filter based on any user object attribute.
For example, you could add the string “NoSync” to the extensionAttribute15 user attribute for each user in your on-premises organization that you don’t want to sync to the cloud. In this example, after you have configured the on-premises user, you create a filter rule in Identity Manager to exclude the “NoSync” users from the synchronization process
Open dirsync installation folder at %SystemDrive%Program FilesWindows Azure Active Directory SyncSYNCBUSSynchronization ServiceUIShell and run the miisclient.exe as administrator.

On the Management Agents Tab, double click SourceAD

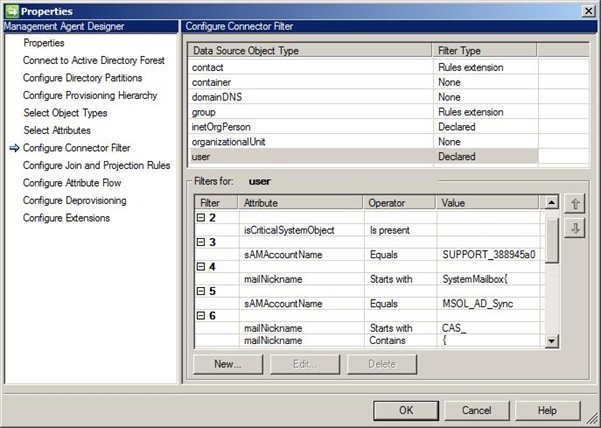
Click Configure Connector Filter;
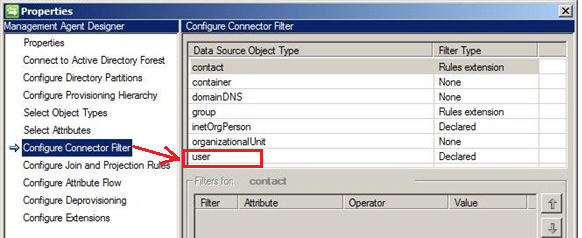
Select user in the Data Source Object Type column. In here you can see some examples of accounts being excluded already such as Exchange System mailboxes or the MSOL_AD_Sync account used by DirSync;
Click New;
In Filter for user, on the Data Source attribute, select extensionAttribute10. For Operator select Equals and then type noOffice365in the Value field. Click Add Condition and then click OK;
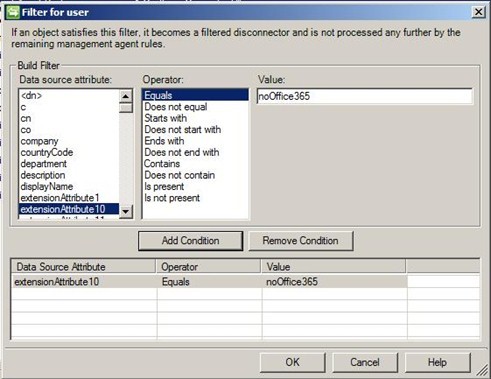
Click OK again;
On the Management Agent tab, right-click SourceAD, click Run, click Full Import Full Sync and then click OK to perform a full sync;
Once finished, you can check the results at the bottom left corner of the window.
Conclusion:
You can find more information and discussion at the office 365 forum http://community.office365.com/en-us/f/613/t/247257.aspx