When you intend to secure your email communication and want to ensure that your messages are only opened, forwarded or acted upon only by the intended recipients, you need to use the AADRMS that comes as a SAAS service of office 365. However the service requires some wizard driven configuration at the tenant level and certain level of administrative task to complete the service configuration.
I am documenting the process on how to configure Office 365 Message Encryption (OME), activating/ setting up Azure RMS and all necessary ExchangeTransport Rules.
We will create a transport rule that will enable Office 365 Message Encryption on messages with a Sensitivity level set to Confidential.
The process to setup and enable Office 365 Message Encryption is really easy. There are three main steps that need to be followed
- Activate Azure Rights Management
- Setup Azure Rights Management for Exchange Online
- Setup transport rules to enforce message encryption in Exchange Online
The steps to enable this are as follows:
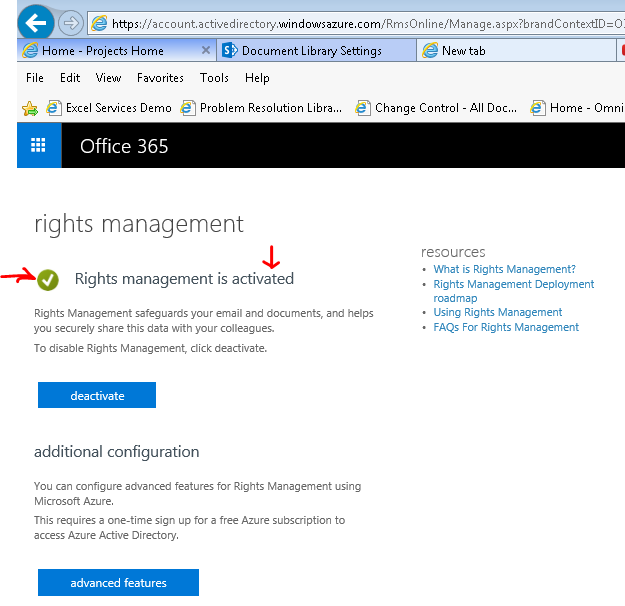
1. Activate Azure Rights Management for Office 365 Message Encryption
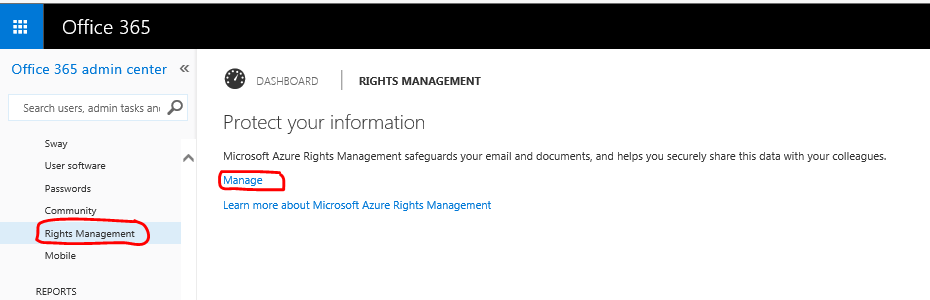
Login to Microsoft Online Portal with a Global Admin Account
Open the App Launcher
Select ADMIN
Select SERVICE SETTINGS from the left pane
Click RIGHTS MANAGEMENT
From within RIGHTS MANAGEMENT click Manage
On the management page, click ACTIVATE
Click ACTIVATE again on the popup asking if you are sure you want to activate Rights Management
It was previously activated.
2. Set up Azure Rights Management for Office 365 Message Encryption
If you attempt to use Office 365 Message Encryption before first enabling IRM licensing, the operation will fail and give you this message:
“You can’t create a rule containing the ApplyOME or RemoveOME action because IRM licensing is disabled”
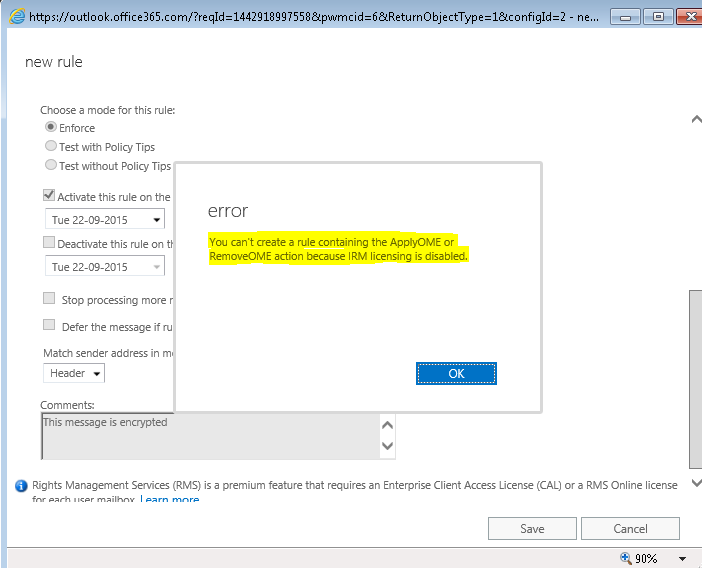
To fix this, we need to enable IRM licensing using the Admin portal and PowerShell
Here are the steps:
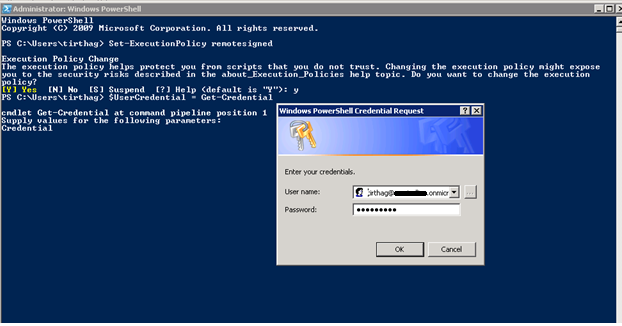
Connect to your Exchange Online account by using Windows PowerShell
Begin configuration of Exchange Online:
( If you have never used remote powershell with Exchange Online run the following command: set-executionpolicy remotesigned )
Login with this command:
$UserCredential = Get-Credential
$Session = New-PSSession -ConfigurationName Microsoft.Exchange -ConnectionUrihttps://ps.outlook.com/powershell/ -Credential $ UserCredential -Authentication Basic –AllowRedirection

Import-PSSession $Session

Run the following commands to enable Rights management within Exchange Online:
Set-IRMConfiguration –RMSOnlineKeySharingLocation “https://sp-rms.na.aadrm.com/TenantManagement/ServicePartner.svc“

Import-RMSTrustedPublishingDomain -RMSOnline -name “RMS Online”

Set-IRMConfiguration -InternalLicensingEnabled $true

For regions outside North America, please substitute .NA. with .EU. for the European Union, and .AP. for Asia
e.g.: https://sp-rms.eu.aadrm.com/TenantManagement/ServicePartner.svc
e.g.: https://sp-rms.ap.aadrm.com/TenantManagement/ServicePartner.svc
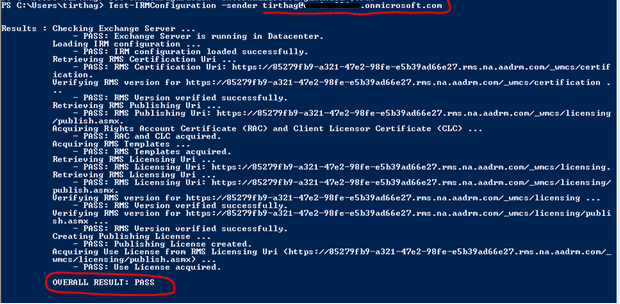
Optionally test the configuration by running the following command:
Test-IRMConfiguration -sender tirthag@xxxxxxxxx.onmicrosoft.com
3. Create the OME Transport Rule
We will create a transport rule that enables Office 365 Message Encryption if the message is sent to a recipient outside the organization and the Sensitivity header have been set to Confidential.
Follow these steps:
- Log in to your Office 365 Admin Portal and navigate to Exchange Control Panel (Admin\Exchange).
- Navigate to Mail Flow, click the + icon and select Create a new rule…

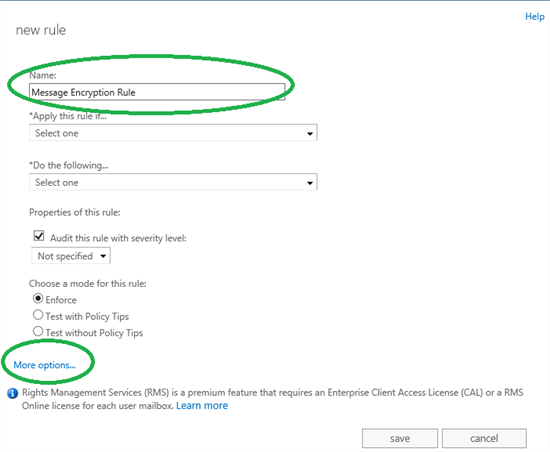
- Give the rule a suiting name and click More options…
- From here you can set your condition as it fits your needs, but for this example we will inspect the Sensitivity header and apply Message Encryption based on that. To do so, select the following conditions: Apply this rule if… A message header includes any of these words
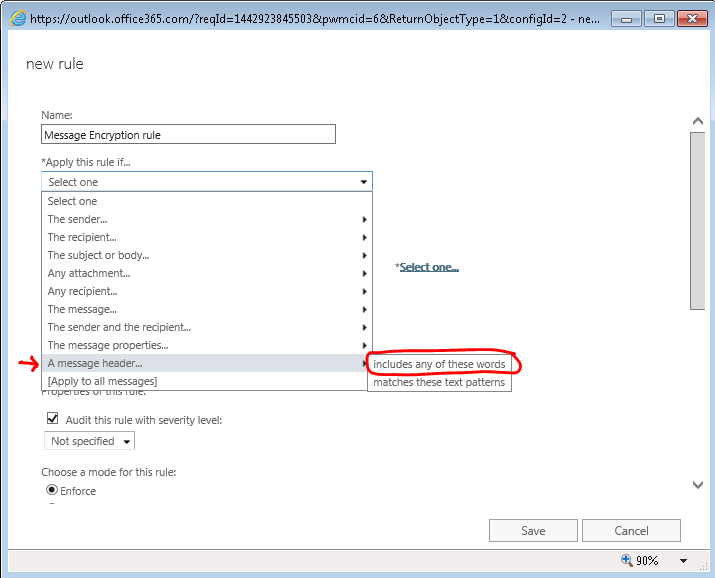
- Complete the Apply this rule if-condition by clicking the properties Enter text and Enter word so that the condition makes ‘Sensitivity’ header includes ‘Confidential’

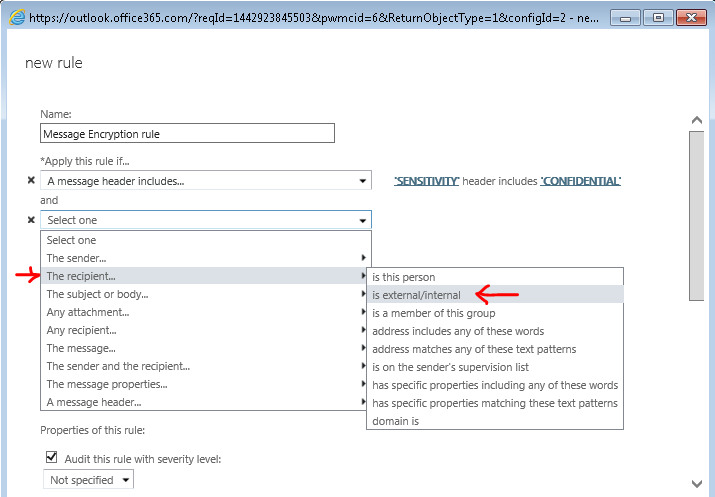
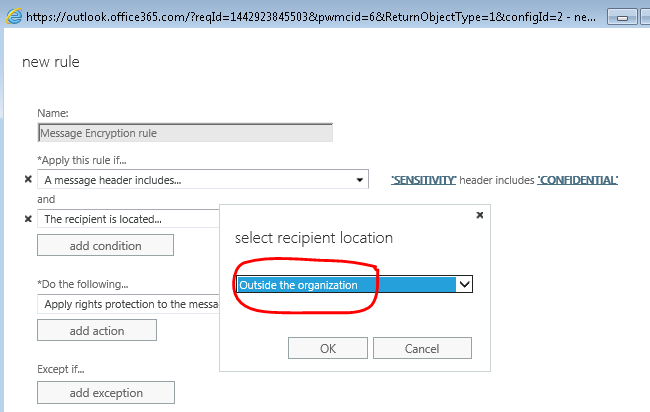
- Click Add condition and select The recipient… Is external/internal. Click Select one… and select Outside the organization and hit OK
- Proceed with clicking Do the following… and select Modify the message security… and select Apply Office 365 Message Encryption
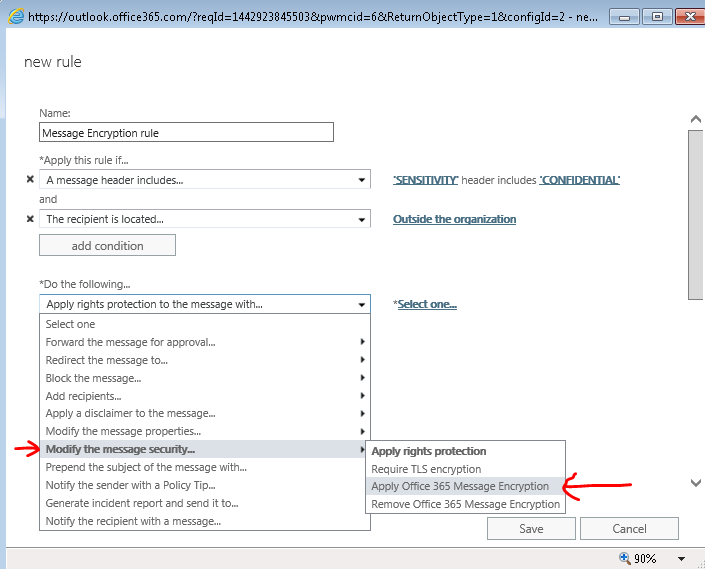
Hit Save at the bottom of the New rule editor.
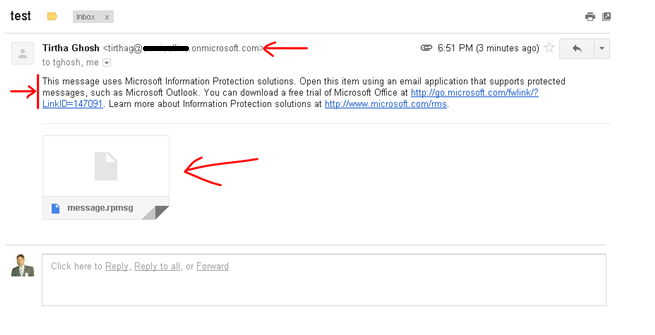
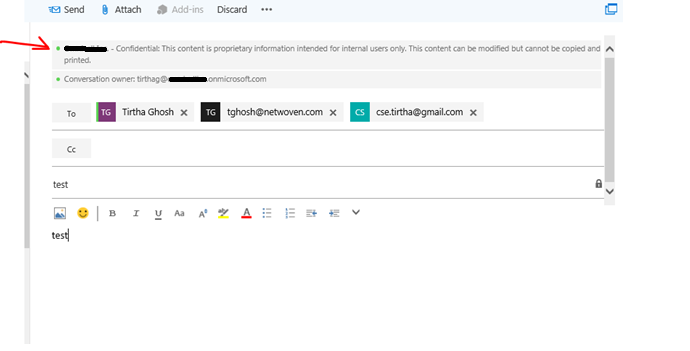
Now you can create a message with the sensitivity level set to Confidential and send this to a recipient outside our organization. Our transport rule will apply Office 365 Message Encryption to the message.
To summarize this post, Office 365 Message Encryption (OME) is a service built on Azure Rights Management (Azure RMS) that lets you send encrypted email to people inside or outside your organization, regardless of the destination email address (Gmail, Yahoo! Mail, Outlook.com, etc.).
Office 365 Message Encryption FAQ
Testing
Receiving email