This document is targeted for organizations who are in coexistence with exchange online (hybrid exchange organization) and has migrated all mailbox and exchange resources to exchange online. Post migration, the organization would end up with a redundant Exchange Server with no dependencies and thus would follow the process to decommission exchange server 2013.
This article describes the decommissioning of last exchange server and removing hybrid setup where most of the areas that needs to be considered are covered.
Step 1. Removing the hybrid configuration
Run “Remove-HybridConfiguration” PowerShell command in on-premise exchange server.
Using the PowerShell command is not actually the only process to remove all the object which created at the time of hybrid setup. Subsequently, some manual interventions are needed to clean up all associated objects.
Step 2. Manually remove the hybrid connectors
Before you go ahead to remove the connectors, double check that no other domains are used to relay mail between O365 and on-premises. Importantly your MX record must have already been cutover to Exchange online. If we are there are no dependencies, then remove these connectors as shown in “Figure 1″

Figure 1: Removing inbound and outbound connectors created in hybrid setup.
Step 3. Manually remove organizational sharing
Now we should remove the organizational sharing rules for free/busy and calendar sharing between on-premises and O365. Since, this is an optional task but to make the tenant clean we should remove the all the settings which are no longer used as shown in “Figure 2”.

Figure 2: Removing organizational sharing.
You may also like: Build a Superior Enterprise Cloud with Microsoft
Step 4. Clean-up Mailbox database
Next, we must check, how many databases are mounted and are working or holding the mailboxes like system, Arbitration or Discovery mailboxes. Before removing the databases, we must clean and remove all the mailboxes residing in these databases or else we will not be able to remove it later.
Get-Mailboxdatabase : fl ebdfilepath (To check the location of databases)
An attempt to remove all mailbox databases without removing the residential mailboxes would lead to an error shown in “Figure 3”. This error is a failure notification stating that database contains the mailboxes which needs to be deleted before database removal.
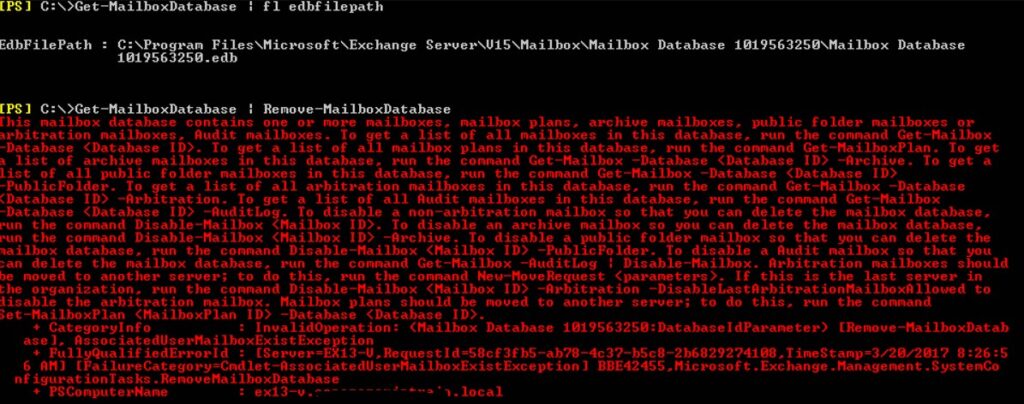
Figure 3: The error during the removal of database containing mailboxes.
Once you have removed all mailboxes from the database, run the following power shell commands:
Get-Mailboxdatabase | Remove-mailboxdatabase
But, the default mailbox database won’t be deleted Since, the database has some system and arbitration mailboxes. Hence you must disable the arbitration mailbox before attempting to delete them.
Step 5. Disable Arbitration Mailbox
To check how many arbitration mailboxes are residing in the default database.
Get-Mailbox -Arbitration -Database <Database Name>
To disable all the arbitration mailboxes, execute the following command.
Get-Mailbox -Arbitration -Database <Database Name> | Disable-Mailbox -Arbitration -DisableLastArbitrationMailboxAllowed

Figure 4: Disabling all the arbitration mailboxes.
Step 6. Delete the default mailbox database.
Now the default mailbox database can be deleted using the following command:
Get-MailboxDatabase | Remove-MailboxDatabase
Figure 5: Removing database
A warning may appear because of replication failure in active directory topology though the process would complete flawlessly.
Step 7. Removing messages from queue.
It looks that we are almost done but not yet. We are just a step away from performing the last ritual of uninstalling the Exchange product from the server. The last piece is to remove all messages that may by lying in the queue. Run the following script to remove the:
Get-Message : Remove-Message

Figure 6: Removing the messages from queue.
Step 8. Uninstall Exchange Product
You can now start the product uninstallation from “Add remove program” options in control panel.

Figure 7: Uninstalling exchange binary
Once it’s done then a reboot is required to complete the uninstallation process.
Hope you have enjoying reading through my post. Feel free to post question and any further clarity required.