
Recently Microsoft introduced a new feature in Windows 10 desktop OS – named ‘Windows Sandbox’. Sandbox is an isolated and lightweight desktop OS, atop your existing Windows 10 install.
Most often, we need to try and test a certain application that requires us to do an install. However, performing this install may at times collect garbage, redundant application, bloated registry and corrupted OS, having to re-install the OS to remediate.
The solution that did exist is that most windows Desktop OS from windows 7 Versions onwards provided Hyper-V role where one can create a VM in isolation. The biggest drawback is that it usually becomes an overkill on hardware resources and rather time-consuming.
Windows Sandbox provides the ability to quickly turn your existing Windows OS to create a cloned VM from the existing install and run in total isolation so that you can save time in preparing a VM and get started with your testing and simply discard once you are done. It is lightweight and can run with the same standard hardware configuration.
Objective
In this article, we will see how the Windows Sandbox works and how can we manage and configure Windows Sandbox environment
Why Windows Sandbox?
There are several reasons that make Sandbox a cool feature. By this intelligent feature, we can optimally use of our desktop resources.
Please go through Below key points of Windows Sandbox.
Features of Windows
Windows Sandbox is now windows feature. You don’t have to rely on the third-party application to create a sandbox environment or import VHD file to create one.
This feature is available in Windows 10 Pro or Enterprise Insider build 1903 (Build 18323) or later after May 2019 update.
Immaculate image of your current OS
Whenever you run Windows Sandbox it will be a clean environment for you, as if you are running a fresh installed OS, taken from your existing Windows 10 install.
Disposable
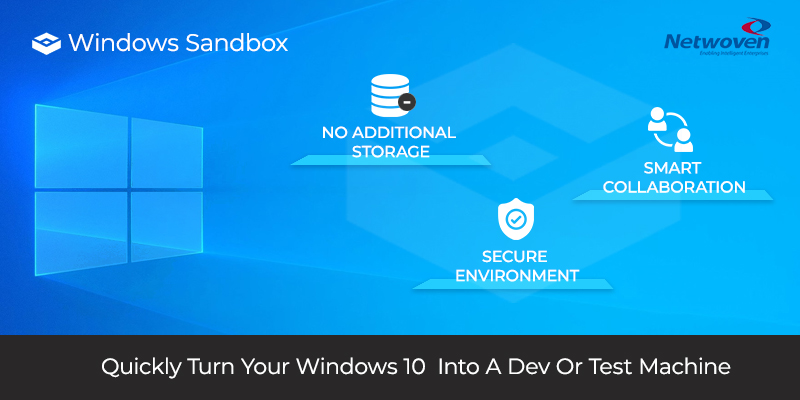
Windows Sandbox environment purges the settings and configuration once the application closed. So, there is no additional storage requirement for the sandbox environment.
Secure Environment
Windows Sandbox runs in separate kernel and there is no link with the host. Sandbox relies on Microsoft hypervisor to run on a separate kernel.
Smart Collaboration
Windows sandbox uses integrated kernel scheduler, smart memory management, virtual GPU and host network in a very efficient manner.
Prerequisites for using the feature:
- Windows 10 Pro or Enterprise build 18305 or later
- AMD64 architecture
- Virtualization enabled in BIOS
- Minimum 4GB of RAM
- Minimum 1GB of free disk space (SSD recommended)
- Minimum 2 CPU cores
Installation
1. Enable virtualization
- If you are using a physical machine, ensure virtualization capabilities are enabled in the BIOS
- If you are using a VM, enable nested virtualization with this PowerShell command:
Set-VMProcessor -VMName -ExposeVirtualizationExtensions $tru
2. Go to start and search with “turn windows feature on or off” and click open the Windows Features. Select Windows Sandbox from the feature list and install it. You might be asked to restart the computer.

3. After successful installation of the feature, go to start menu and find Windows Sandbox run it.
4. Use it and close the application when you are done.
5. Once close all sandbox content will be discarded and permanently.
Note: Windows Sandbox instance will not be activated if you want to activate then you must provide an activation key. As an alternative, you can re-arm the OS.
Note: After the feature update which is released in May 2019 Microsoft has confirmed that users who have installed KB4497936 may find the windows sandbox fail to update. Some of the users reported this to Microsoft. Microsoft is working on this and soon release an update for sure.
Custom Configuration for Windows Sandbox
You can use some predefined configuration which will be configured for you for every time you create a Sandbox session.
To create a Windows Sandbox configuration fie use these steps:
1. Open a Notepad.
2. Click the file menu and select save as option
3. Type desired name and use the “.wsb” extension.
4. Append the saved file with the following codes and save it. After this when you double click and open it, the Sandbox environment will return the same result.
To manage virtual network adaptor on Windows Sandbox
If there is a requirement to isolate your sandbox environment from the host system, follow these steps to create the configuration file.
1. Open and edit the saved configuration file and type the following:
<Configuration>
<Networking>Disable</Networking>
</Configuration>
2. Save the file.
3. Double click open configuration file will open Windows sandbox environment with disable the network.
By default sandbox, environment enables network connectivity with the host, anyway if you want to create a configuration file with the same configuration follow these steps to configure the file.
1. Open and edit the saved configuration file and type the following:
<Configuration>
<Networking>Default</Networking>
</Configuration>
2. Save the file.
Map a host folder on windows sandbox
If you want to access a local host folder in the sandbox environment once you launch the environment, then create this configuration file.
1. Open and edit the saved configuration file and type the following:
<Configuration>
 <MappedFolders>
   <MappedFolder>
<HostFolder><Host folder path>
<ReadOnly>true</ReadOnly>
     </MappedFolder>
         </MappedFolders>
</Configuration>
2. Save it.
3. In a sandbox environment, the folder should appear in the user desktop.
Note: ReadOnly use the “true” value to enforce accessing the folder as read-only mode. Use the “false” value to read and write access.
Run startup command on Windows Sandbox
If you want to add a program in the startup, then create this configuration file.
When you launch the sandbox environment it will automatically execute the and run the program at startup every time.
1. Open and edit the saved configuration file and type the following:
<LogonCommand>
 <Command>cmd.exe</Command>
</LogonCommand>
2. Save it.
Once this is complete, Windows Sandbox will run the command that you specified after the session has been created.
Control multiple options on windows sandbox
You can also set multiple condition in a configuration file. Create this below configuration file to achieve this.
1. Open and edit the saved configuration file and type the following:
<Configuration>
 <Networking>Disable</Networking>
 <MappedFolders>
 <MappedFolder>
 <HostFolder>C:\Temp</HostFolder>
 <ReadOnly>True</ReadOnly>
 </MappedFolder>
 </MappedFolders>
 <LogonCommand>
 <Command>cmd.exe</Command>
 </LogonCommand>
 </Configuration>
2. This will customize windows Sandbox with all available option.
3. Save it.
Note: Configuration file content is case sensitive.