In one of my previous blogs, I have discussed, how we can get the group information of current logged in user and modify the user view in an SPFx application depending on his group’s permission level. Here in this blog, I will show how we can change the permission level of any user by changing his group from an SPFx application.
But first, let us have a quick intro to SharePoint default groups and their permission levels.
SharePoint Default Groups:
SharePoint sites by-default have several groups like site visitor, site member, site owner, etc. with specific permission levels like read only, contribute, full access, etc. Users belong to the same group have the same level of permission. For example, all users from the site visitor group have read only permission or all users from the site member group have contributed permission or all users from the site owner group have full access.

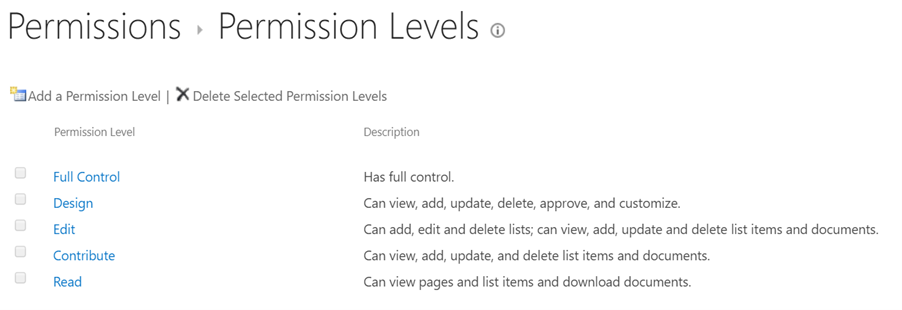
Permission levels:
Permission levels define the area of control over the SharePoint site collection. It is self-explanatory that members have more access than visitors or owners have more access than members. That means user belong to site visitor group cannot contribute or members cannot change other user’s permission.
Sometimes we need to change the permission level of any user. For example, if a user from a visitor group (having read only permission) wants to add something, then we need to give him edit permission. To achieve this, that user needs to be added to the Site Members group as Site Members have edit permission level.
But we should keep this in mind that only users from Site Owners group or Site Administrators can change the permissions of site users.
Let’s have a quick look on how this can be done manually from site permission settings which are out of the box:
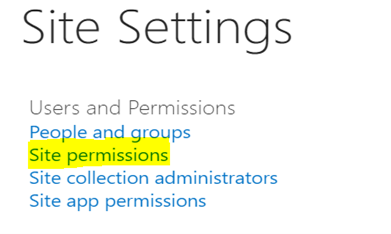
Change Permission Manually:
Step 1: Go to site settings and select site permissions.
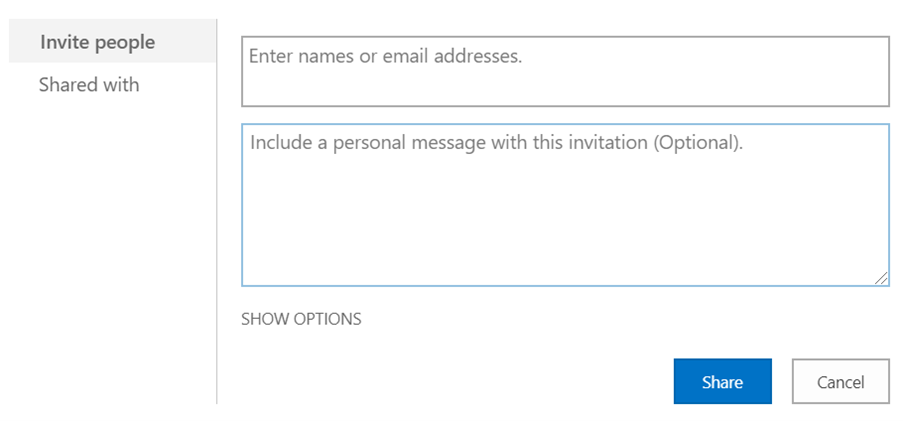
Step 2: Select required site group and click new button.

Step 3: Provide user email and click share button.
User can also be deleted from the user’s list of any group at any time by the admin.
Now, without delaying further let us jump to the point, how to change the permission from an SPFx application.
Change permission level of a user in SharePoint site from SPFx webpart
We can change permission level of users by adding them to specific SharePoint group or removing them from a specific SharePoint group from SPFx webpart, like on click of a button in a SPFx webpart. All we need are as follows:
- 1. A user account having “Full Control” permission level.
- 2. A Power Automate (MS Flow) to be created using that account to add user to a SharePoint group.
- 3. A Power Automate (MS Flow) to be created using that account to remove user from a SharePoint group.
- 4. A SPFx webpart from where the flows will be triggered.
SPFx webpart
First, let us see what needs to be done in SPFx webpart. Following is a webpart for demo.
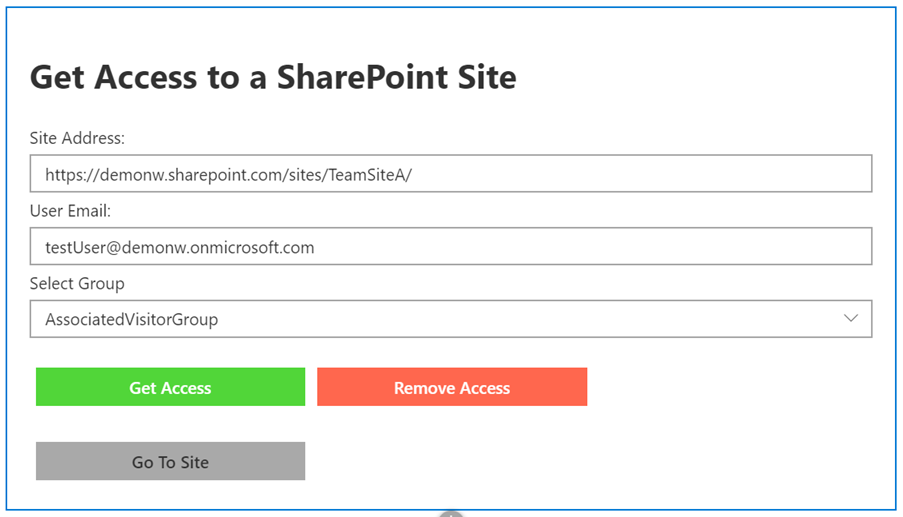
Here we have a text field to set requested site address and another text field to set requester’s email. A dropdown, having 3 options- AssociatedVisitorGroup, AssociatedMemberGroup, and AssociatedOwnerGroup, to select the user group to which the user needs to be added or removed from.
Get access button will call a flow called “Grant Access Flow”, to add a user to the selected group of the requested site and remove access button will call a flow called “Revoke Access Flow” to remove the user from the selected group of the requested site.
The bottom button “Go to Site” to open the requested site.
Following are the permission levels of the above-mentioned groups-
AssociatedVisitorGroup – Read Access
AssociatedMemberGroup – Contribute Access (Read& Write)
AssociatedOwnerGroup – Full Control
Output
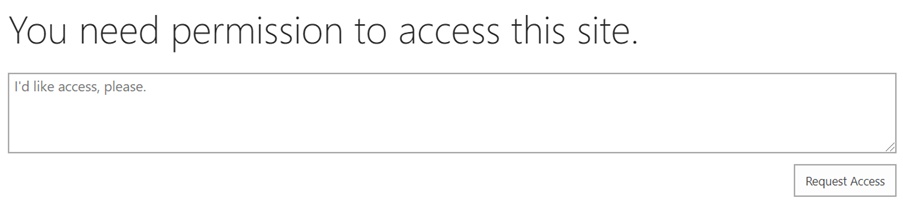
Initially when then user does not have any permission to the site, will see the following screen when open the site.
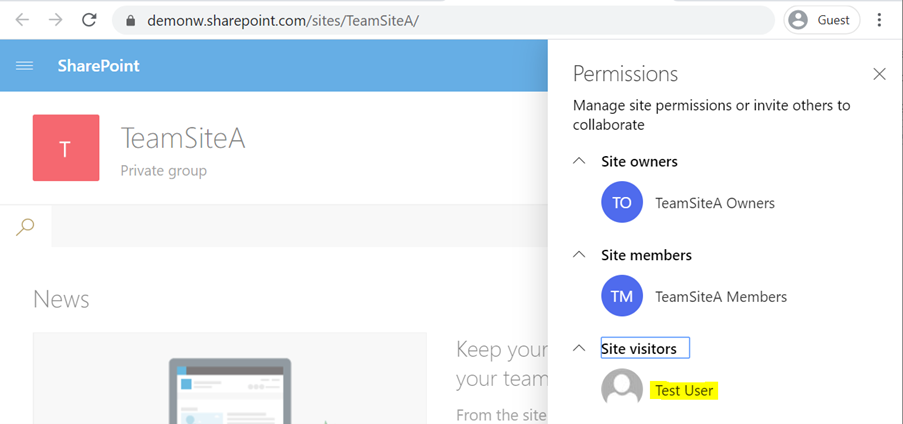
After adding the user to the selected group, the user can open the site and will be able to see them in the selected group in permission settings. For example, if the user is added to visitor group following can be visible in site permission setting-
Following is the function to run a flow with HTTP POST URL of the flow and metadata in JSON string format-
function runFlow(postUrl: string, body: string): Promise<HttpClientResponse> {
    const requestHeaders: Headers = new Headers();
    requestHeaders.append("Content-type", "application/json");
    const httpClientOptions: IHttpClientOptions = {
      body: body,
      headers: requestHeaders,
    };
    return props.context.httpClient
      .post(postUrl, HttpClient.configurations.v1, httpClientOptions)
      .then(
        (response: Response): Promise<HttpClientResponse> => {
          return response.json();
        }
      )
      .catch((e) => {
        console.log(e);
      });
  }
Following function should be called on click event of Get Access button-
const runGrantPermissionFlow = async (group) => {
    const body: string = JSON.stringify({
      userEmail: userEmail,
      siteAddress: siteAddress,
      group: group,
    });
    updateIsLoading(true);
    try {
      let response = await runFlow(ADD_USER_FLOW, body);
      updateIsLoading(false);
      if (response["success"] == "true") {
        alert("User added susseccfully to " + group + " of " + siteAddress);
      }
    } catch (e) {
      updateIsLoading(false);
      alert("error:" + e);
    }
  };
Following function should be called on click event of Remove Access button-
const runRevokePermissionFlow = async (group) => {
    const body: string = JSON.stringify({
      userEmail: userEmail,
      siteAddress: siteAddress,
      group: group,
    });
    updateIsLoading(true);
    try {
      let response = await runFlow(REMOVE_USER_FLOW, body);
      updateIsLoading(false);
      if (response["success"] == "true") {
        alert("User removed susseccfully from " + group + " of " + siteAddress);
      }
    } catch (e) {
      updateIsLoading(false);
      alert("error:" + e);
    }
  };
Dropdown should have following options –
const option = [
    {
      text: "AssociatedVisitorGroup",
      key: "AssociatedVisitorGroup",
    },
    {
      text: "AssociatedMemberGroup",
      key: "AssociatedMemberGroup",
    },
    { text: "AssociatedOwnerGroup", key: "AssociatedOwnerGroup" },
  ];
On click event of “Go to Site” button write the following-
onClick={() => {
                  window.open(siteAddress, "_blank");
                }}
Power Automates (MS Flows):
Following are the steps of the flows. Most of the steps are the same other than the second last step which adds or removes the user. These flows can be merged into one single flow by receiving an action type from SPFx application. But for ease of understanding, I have kept them separate.
Grant Access Flow:

Revoke Access Flow:
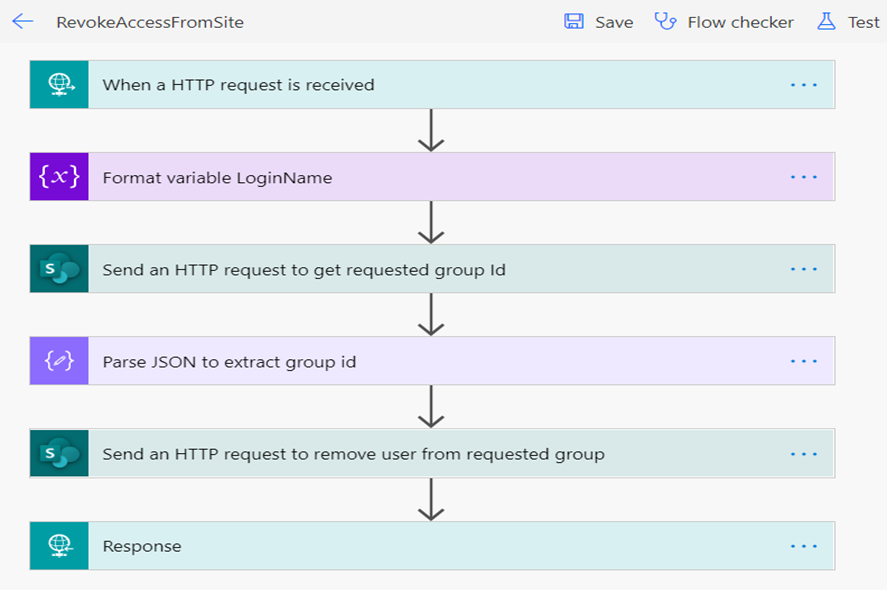
Step 1: When a HTTP request is received:
This the entry point of the flow. This HTTP post URL should be called from the SPFx application.
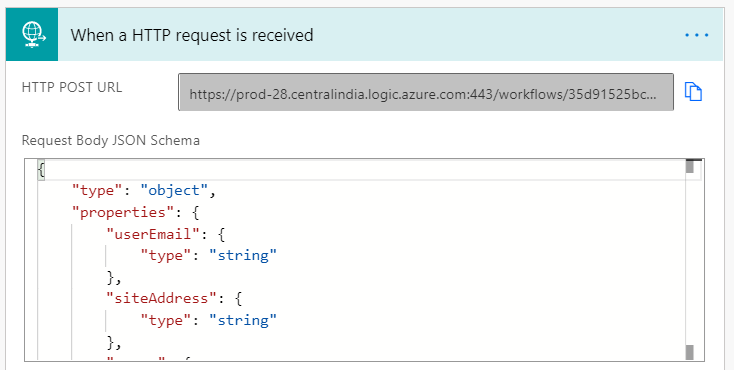
Request Body JSON Schema
{
    "type": "object",
    "properties": {
        "userEmail": {
            "type": "string"
        },
        "siteAddress": {
            "type": "string"
        },
        "group": {
            "type": "string"
        }
    }
}
Step 2: Format login name using userEmail
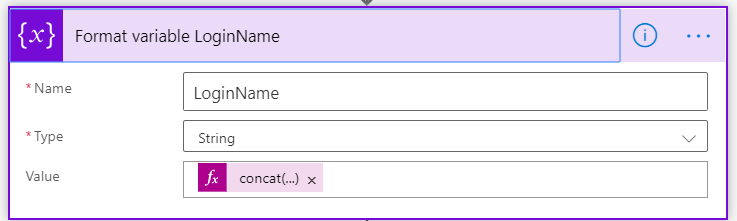
Value will be as follows:
concat('i:0#.f|membership|',triggerBody()?['userEmail'])Step 3: Get Group Id
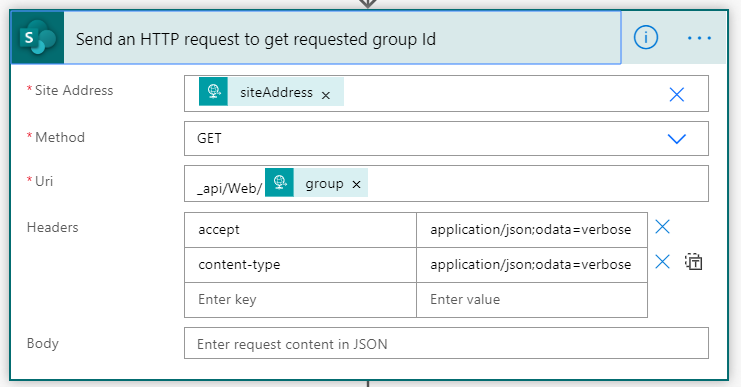
Step 4: Parse JSON to extract group id
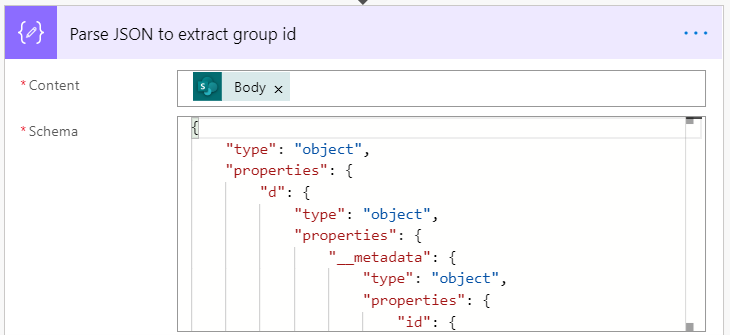
{
    "type": "object",
    "properties": {
        "d": {
            "type": "object",
            "properties": {
                "__metadata": {
                    "type": "object",
                    "properties": {
                        "id": {
                            "type": "string"
                        },
                        "uri": {
                            "type": "string"
                        },
                        "type": {
                            "type": "string"
                        }
                    }
                },
                "Id": {
                    "type": "integer"
                }
            }
        }
    }
}
Step 5:
Add User: (For grant access flow)

Remove User: (For revoke access flow)
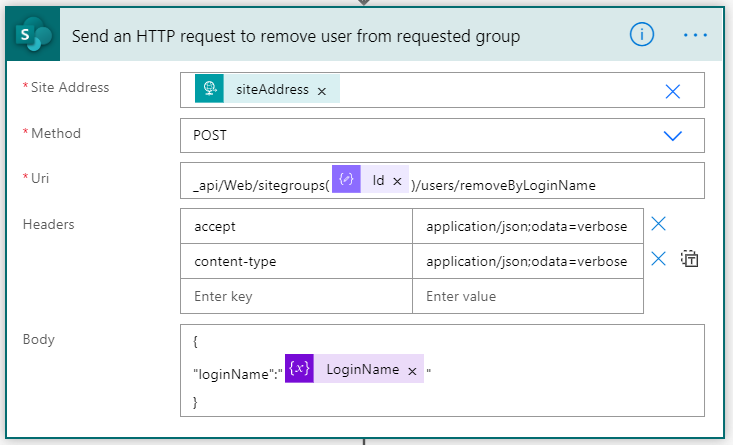
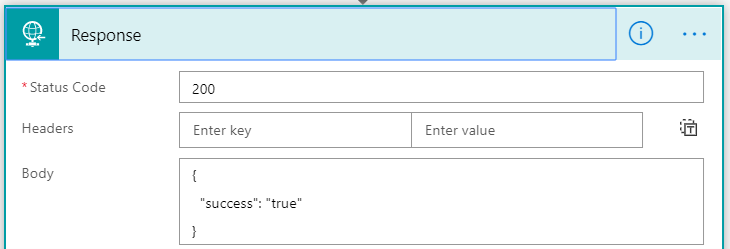
Step 6: Response
This was a quite long page, but hopefully by the end the idea of changing permission of a user is cleared to you. You have learned both how to add user to a SharePoint group and how to remove user from a SharePoint group from site permission settings and as well as from a SPFx webpart. Additionally learned how to call a power automate from SPFx webpart. Key point is, you need to have a user account with “Full Control” permission to create the flow, which is changing the permission on behalf of the user who is using the SPFx webpart.
Hope you have liked it.
At this point you can check the trick to modify user view in a SPFx webpart depending on his permission from this blog post.