Microsoft Graph has opened up a vast opportunity to integrate different enterprise applications and create a seamless experience for enterprise users, where a single interface would serve content of relevance from all of the enterprise applications. This is a great leap towards improving efficiency and productivity. As more and more organizations are adopting Microsoft 365, SharePoint and Teams are rapidly taking up leads as primary work interface for millions of users. For them accessing all relevant business information right from SharePoint and Teams brings that extra comfort. With Microsoft recently releasing Graph connector for Service Now, it is now possible to access Service Now knowledge articles right from the SharePoint Search interface seamlessly just like any other SharePoint content.
This article provides you with a step-by-step guidance to integrate Service Now with your Microsoft 365 tenant. Following this article, you should be able to set up a search capability for your ServiceNow articles in your Office365 Online environment.
Pre-requisites
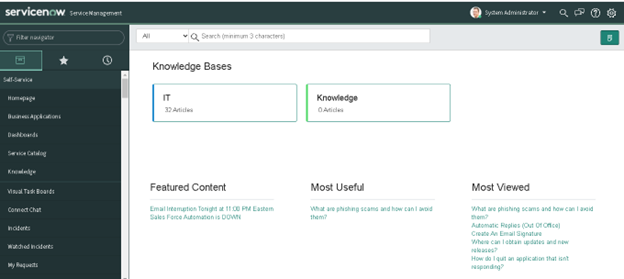
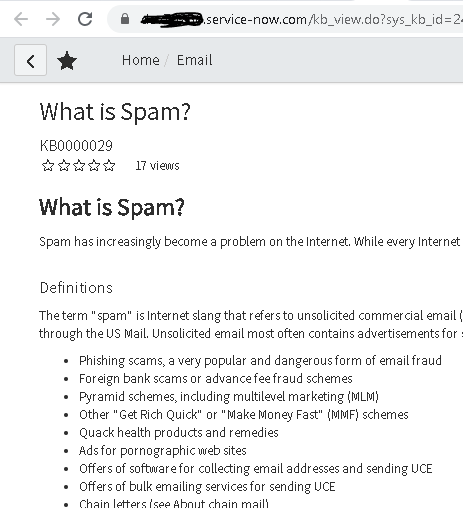
Primarily, you must have a valid ServiceNow account and must login with your credentials to land up on the below home screen. If you are an admin user, your screen would look as below:
In Office 365, we are provided with Microsoft Graph Connectors, which helps to index third party data, and make it appear in Microsoft Search results. The third-party data can be hosted on-premises or in the public or private clouds. These Connectors expand the types of content sources that are searchable in your Microsoft 365 productivity apps and the broader Microsoft ecosystem.
Let us jot down the processes starting from setting up a ServiceNow Connector till getting its data in the search results of a SharePoint Online site.
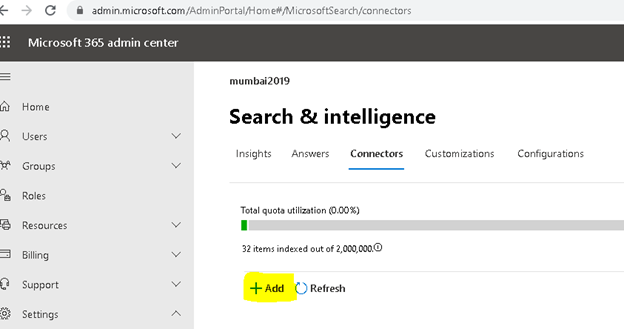
Step 1: Add a Graph connector in the Microsoft 365 admin center
Sign in to your Office 365 admin center
On the left navigation pane select Settings → Search Intelligence → Select the Connectors tab and click on the Add button
Note: You will be able to see this Connectors option only if your Tenant users and administrators have opted into a Targeted Release, as it is a new feature released in Nov 2020. Please refer here to set your tenant users to Targeted Release.
Choose the ServiceNow connector from the below screen

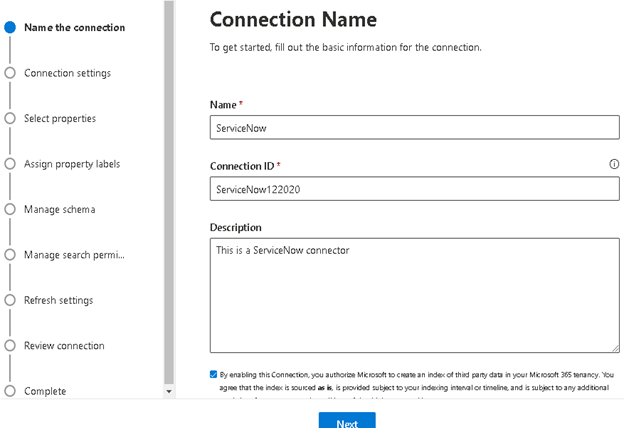
Step 2: Provide the connection name and ID
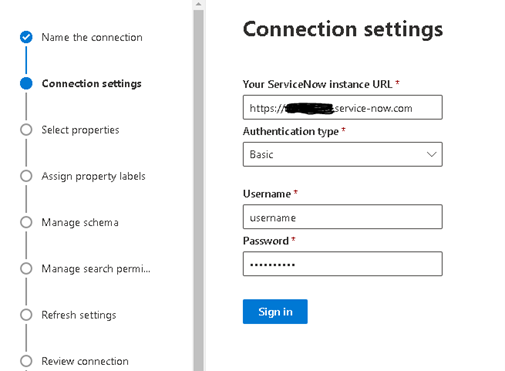
Step 3: Configure the connection settings and properties
I am opting for a Basic authentication type, hence providing my ServiceNow instance URL, username and password
Click the Sign in option and once the sign in is successful you will be taken to the properties section. By default, all the searchable properties will be taken into consideration, but you still have an option to filter out them.
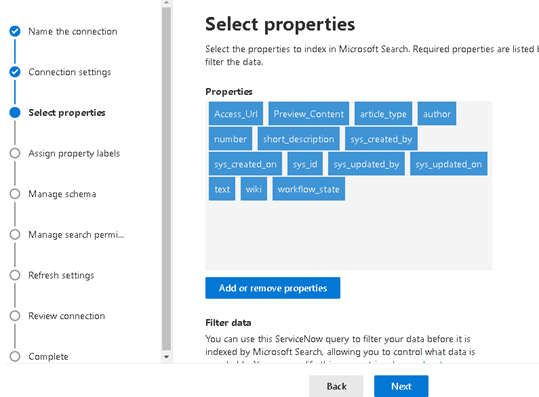
Here I am continuing with the with the default properties selection and building on it in the next section “Assign property labels” where Microsoft has given labels to different ServiceNow columns. If you wish you can change them or live with it.
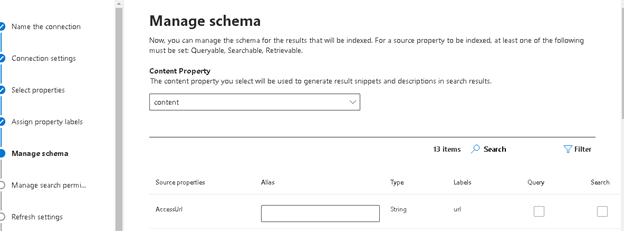
Step 4: Manage the search schema
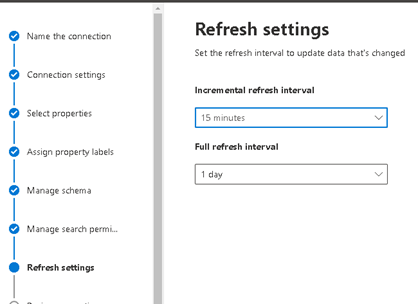
Step 5: Refresh Settings
I have changed my incremental refresh time to 15mnts unlike the default 4 hours.
Step 6: Review and Finish the settings
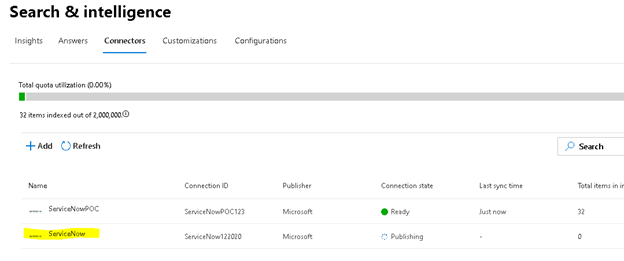
Once you review and click on Finish settings, you can see your connector in the Connectors section with the Connection State as ‘Publishing’. On completion of the publish process, its status will be changed to Ready (similar to the other ServiceNow connector created some time back in the below screenshot).
Step 7: Setup the Vertical
Once the status is marked Ready, you will get an option to create the Vertical towards the right

Click on that link to create the vertical
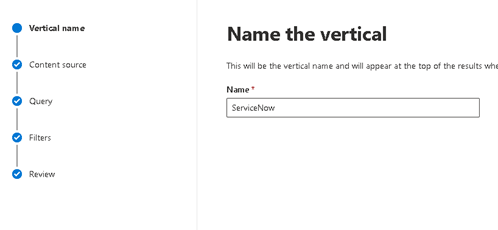
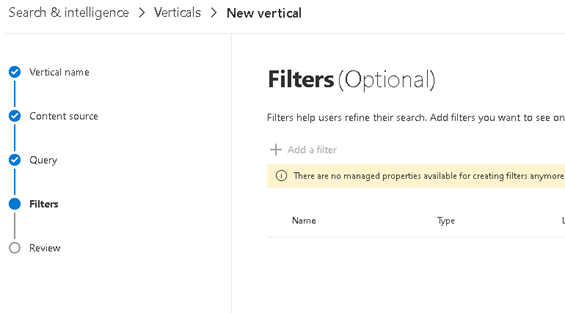
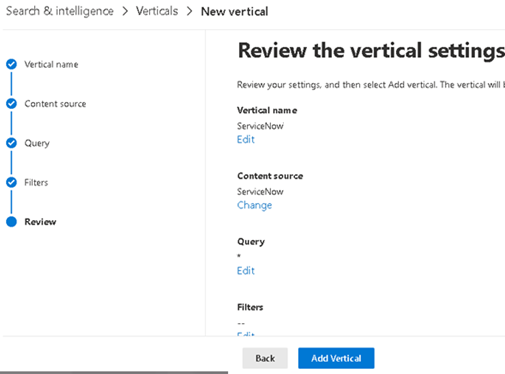
Step 8: Vertical Creation
Setup the Vertical following below screenshots.
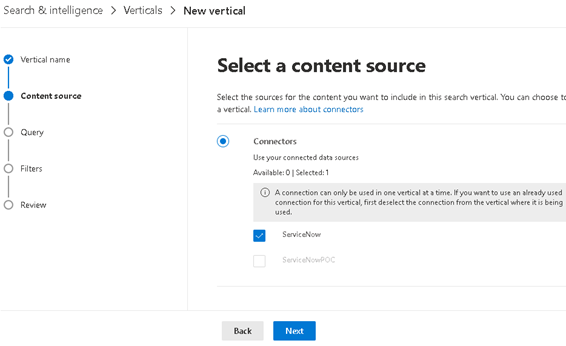
Choose your connector (created in previous steps)
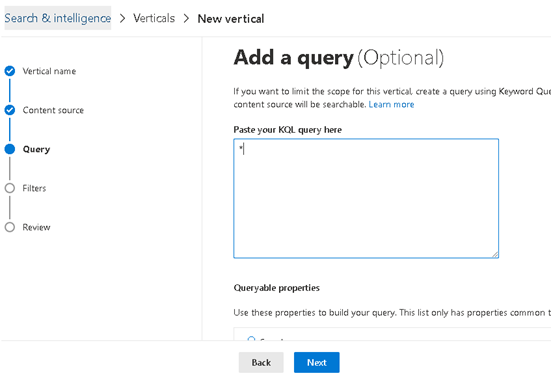
I am providing ‘*’ in the KQL query as I would like all the data to be included in my search results
Review your settings and then click on ‘Add Vertical’
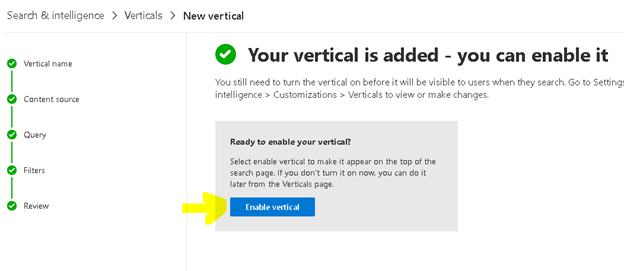
Step 9: Enable the vertical
As soon as the Vertical is created, you need to enable it, else your ServiceNow search results would not be visible in the Search results page.
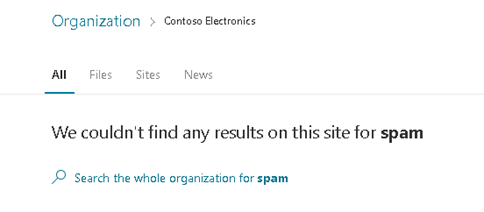
OOPS !! I cannot find any of them in the search results. And I do not see a vertical next to ‘News’ with the name ‘ServiceNow’.
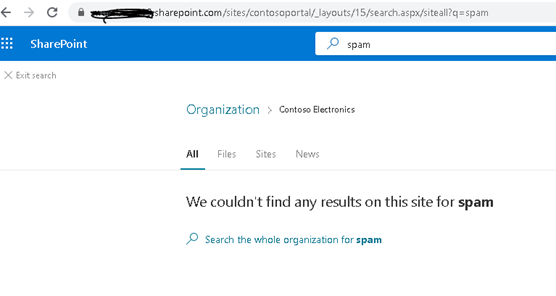
So, something more needs to be done. Let me explain.
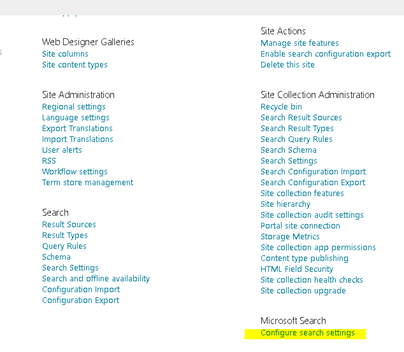
Step 10: Set up the Microsoft Search Settings.
Go to the site settings of your SharePoint site and open the ‘Configure Search Settings’
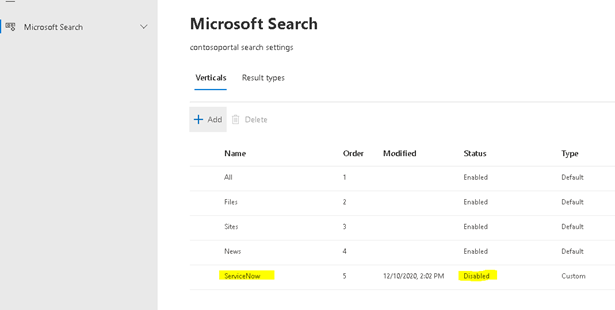
As you can see below, the ‘ServiceNow’ vertical is not present.
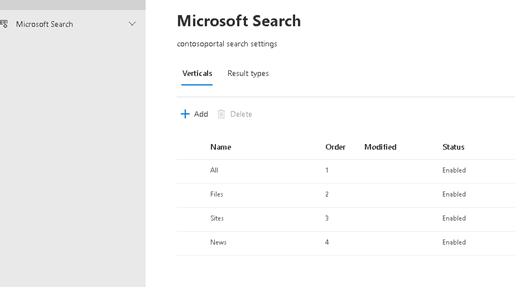
So. let me add it.
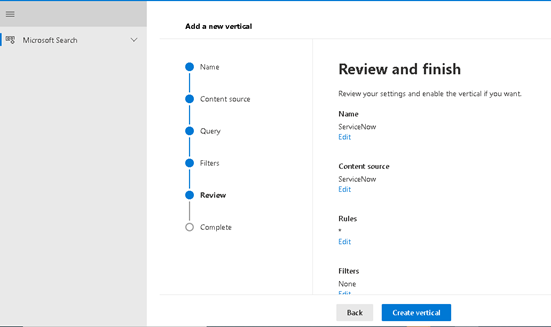
Click on the ‘Add’ button to add the new Vertical. Repeat the steps 7 and 8.
So your review screen should look like this.
Now you can find your Vertical along with the others (see below), but with a Disabled status.
Let me search again
I am not getting the ServiceNow results yet
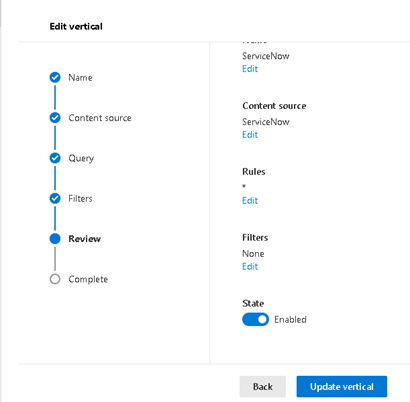
Step 11: Enable the vertical
Change the state to ‘Enabled’
It will take a while to get the vertical refreshed in the Search results page.
If you do not want to wait after enabling it, you can append cacheClear=true to the URL in SharePoint and Office to view the vertical immediately.
Now let search again.
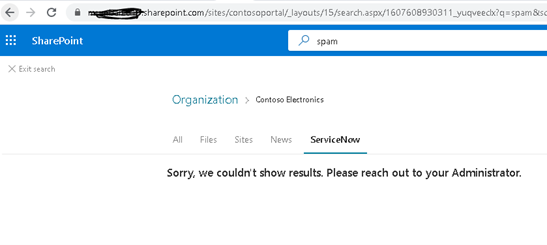
So, we still are missing something, and that is the setup of a result type.
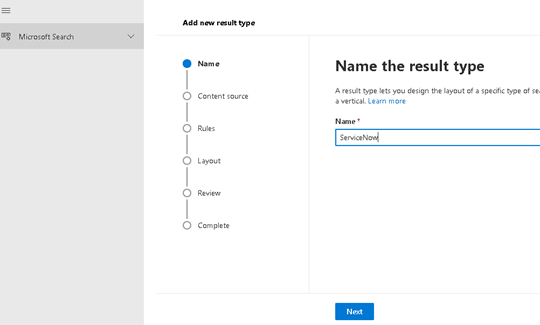
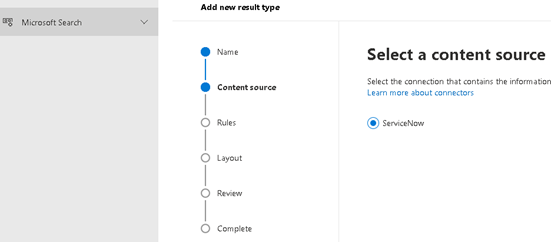
Step 12: Add a Result Type
Go to the tab named ‘Result types’ next to the Verticals and click on the Add button.

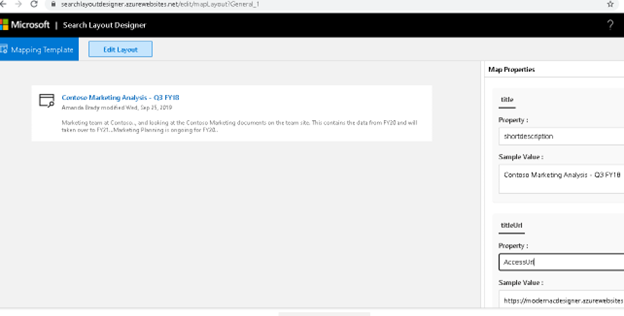
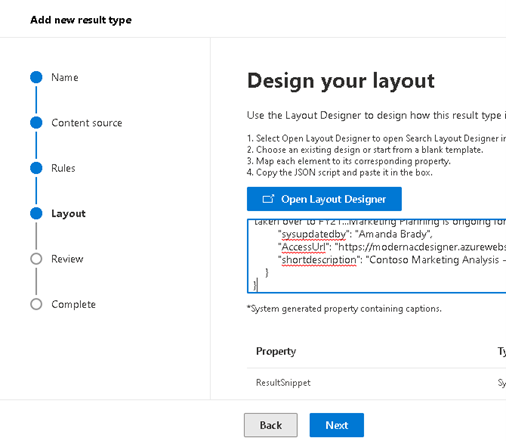
Add a design layout: it is a mandatory step
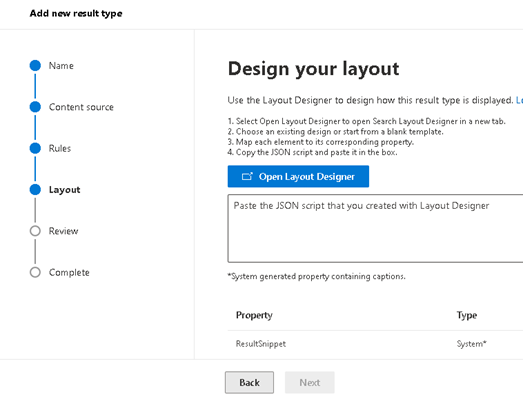
Click on the button ‘Open Layout Designer’
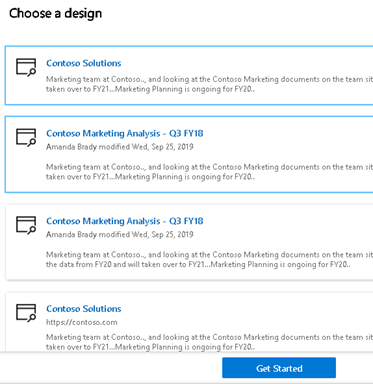
And choose a design
Fill the properties with the ServiceNow columns.
Paste the JSON and click on ‘Next’
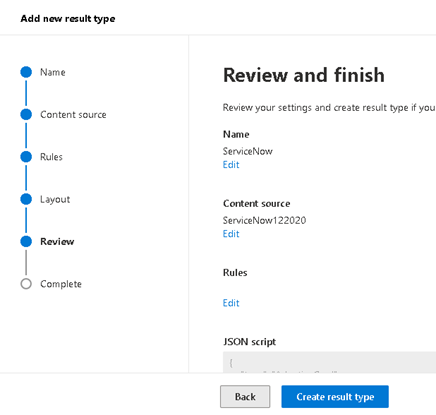
Review and finish the result type creation.

Let us search again.
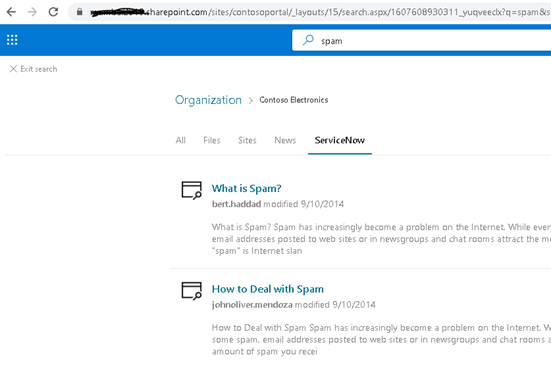
Yippee !! we got the search results now. Let’s open it.
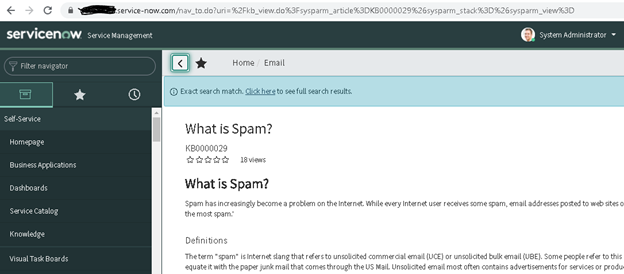
Let us view the same record in the ServiceNow portal
Hope you liked this article and hope it is helpful. Enjoy!!


Hello Pratibha,
Great information in the article. A short question? What does the underlying ServiceNow GUI look like as far as structure in relation to SharePoint? I did not see the end product after the integration steps above.
Thanks,
Kyle
Hi Kyle, This integration does not change the ServiceNow UI, but helps to read or rather access the items/articles in ServiceNow from the SharePoint environment, leveraging the SharePoint Search capabilities. It is helpful in such cases when we are shifting our collaborative platform to Office 365 but still we have a lot of artifacts still with ServiceNow and we would need access to them, until we completely shift to Office 365/SharePoint.