
Introduction:
We hope you had the chance to read our previous blog on the subject, Security Assessment and Solutioning with Microsoft 365 Security and Compliance Center- Part 1, in which we explored Microsoft 365 Security and Compliance center OOTB reports and the potential solutions that may be evolved after analyzing those reports, indicating the current security posture of the enterprise.
In this blog we are going to see how to create solution to enable auto classification and auto labelling in Microsoft-365 environment to secure the different resources in the cloud environment.
Auto classification with sensitivity labels, provides organizations with the capability to automatically designate protection based on the sensitive type in a scalable way.
Why is Auto-labelling required
With predefined sensitive information types and ability to create custom ones, you have the flexibility to create and tailor the auto-labelling policy to specific sensitive information types. You can also scope the policy to a specific SharePoint site or OneDrive or Exchange mailbox. These policies can automatically label files at rest and emails in transit based on the rules you have set.
Advantages of Auto-classification
- No need to train people in an organization to classify sensitive documents, emails, etc. This covers both office apps and workloads like SharePoint, Exchange, OneDrive etc.
- Trainable classifiers can be employed to auto-classify documents, emails, etc.
- Classification is taken care based on the created policies at the security centre and contents are segregated based on the sensitivity of the information.
Diving into solution
At the Microsoft Protection Center, you can explore the relevant settings required to create an auto labelling solution as in the below screenshot.
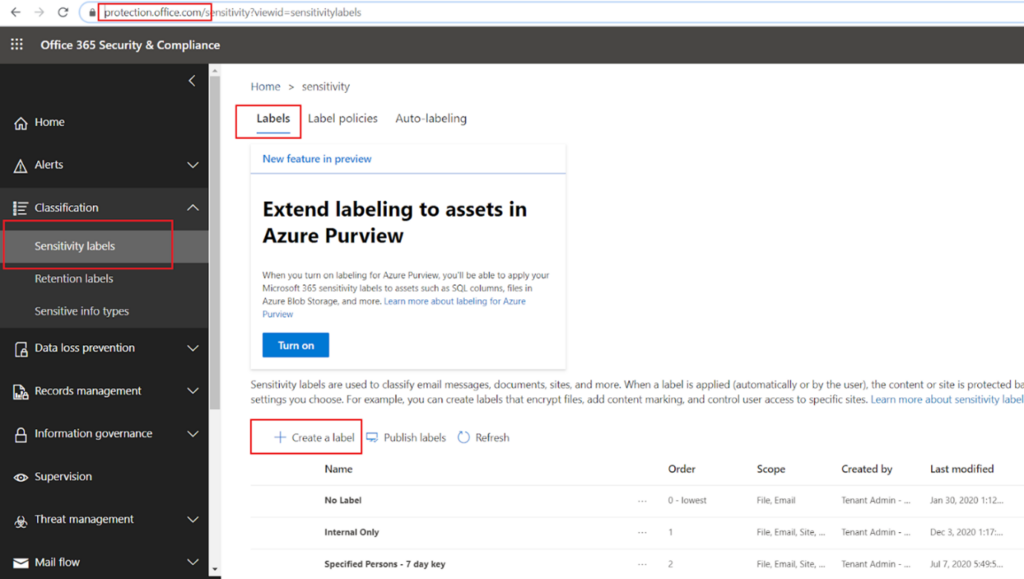
Under sensitivity labels section, you must create some sensitivity labels and publish them first. After creating a few sensitivity labels, we are going to look at how to create an auto labelling policy.
Refer this link to enable the sensitivity labels in your tenant.
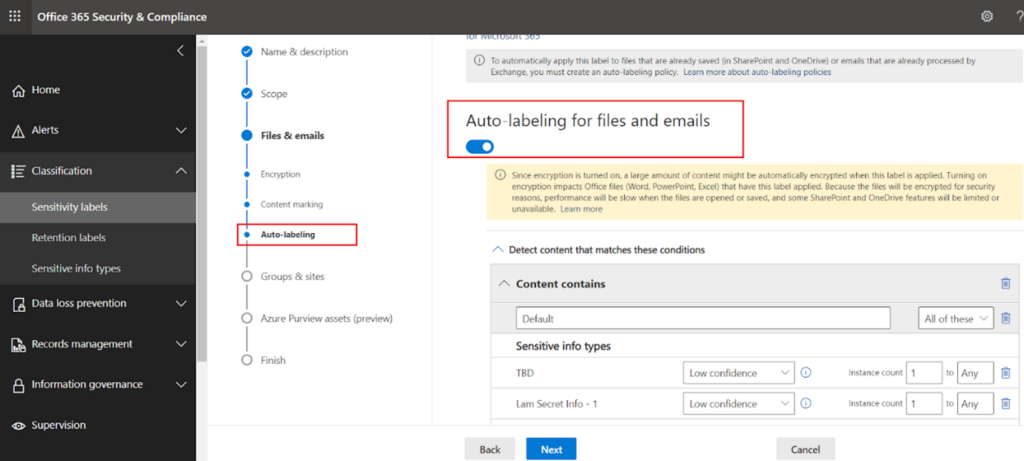
Run this powershell command to enable the settings- Set-SPOTenant -EnableAIPIntegration $trueNext,click on “Auto-labelling” as shown below. It is self-explanatory how the labelling policy is going to be applied on various workloads based on the sensitivity type.
You may also like: Learn how to proactively identify and protect your sensitive information
Auto labelling has two methods by which it works:
- Client side – When users are working in an office app like work, excel etc or emails system will examine the contents and propose a label to apply which user can accept or reject. This client side labelling can be configured in the sensitivity label settings. Based on the sensitive information type you attach with the label setting, that label is going to be proposed if the content has the matching sensitive information. If you create/edit any sensitivity label, you can see the same settings described above.
- Server side – When the content/workload is already saved in SharePoint/OneDrive/Exchange the labels get applied automatically, without any user intervention.
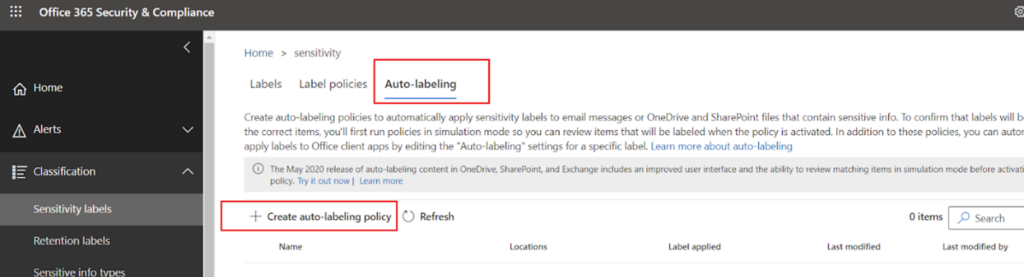
Next, click on “Create auto labelling policy” to create a new policy. A Server side labelling policy can be configured like this.
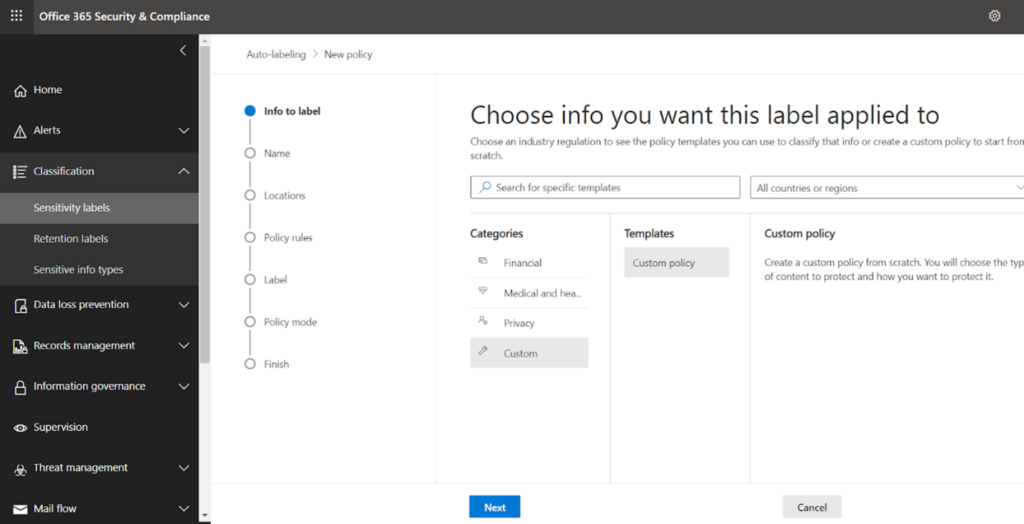
Take any loaded template or go with a new custom policy. Loaded templates are examples of different countries’ default sensitivity types. A custom template has been chosen.
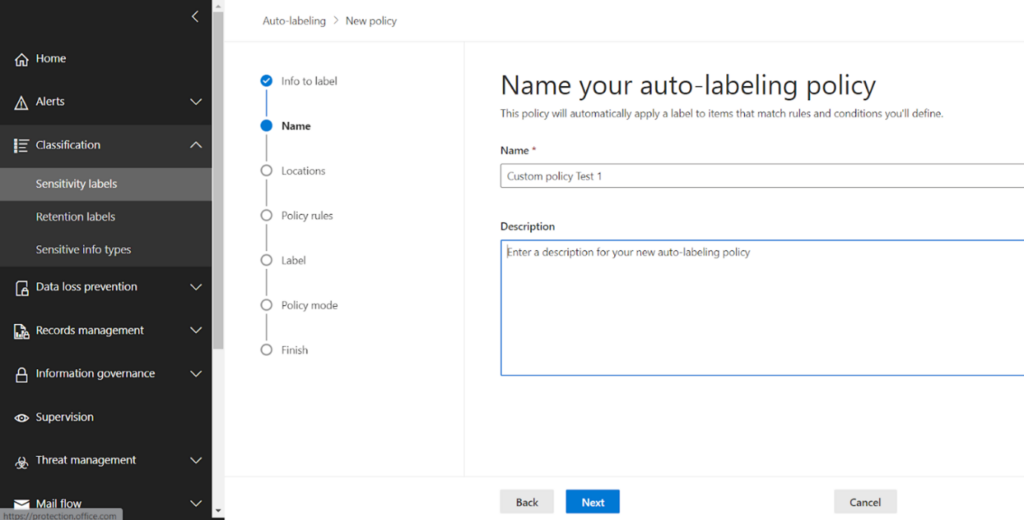
On clicking next, name the policy and specify description if desired
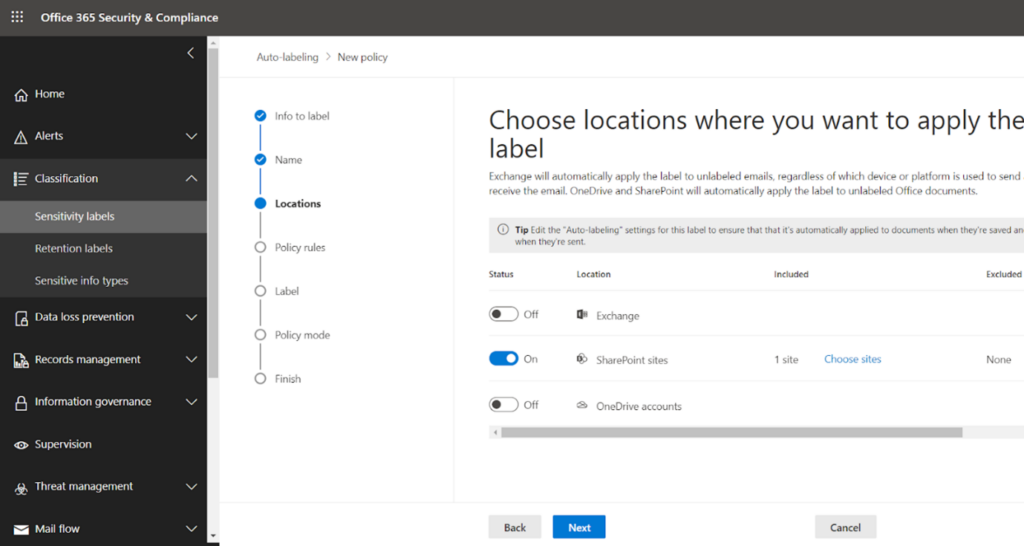
On next click, you get the workloads where you want to enable auto labelling.
I have chosen SharePoint and enabled that; I have added one site here for testing.
In the next part of this series, we will see how Rule types are chosen. Watch this space for ‘Security Assessment and Solutioning with Microsoft 365 Security and Compliance Center- Part 3’
To learn more about Netwoven’s information protection and compliance capabilities, read our datasheet.
Learn how Netwoven’s solution can proactively identify and protect your sensitive data download our Solution Brief.