
Introduction:
This blog post is the second part of my previous blog in which we saw in detail how to save data to a SharePoint list from an adaptive card with an example where a user can create tasks and save them to a list named ToDo. In this blog, we will learn how to display the items from that list in Quickview and update them.
In the next part (Part III) of this series, I will explain how to set up the Viva connection dashboard and deploy our custom adaptive card.
From this blog, you will learn the following –
- How to have multiple Quickviews in a project.
- How to display Quickview on card selection.
- How to fetch items from a SharePoint list and save them in a state variable.
- How to display a list of dynamic data in a Quickview.
- How to set different colors for text in the list inside the Quickview conditionally.
- How to Include an Action on the Row Selection of that List.
- How to update SharePoint list data.
- Few bonus points.
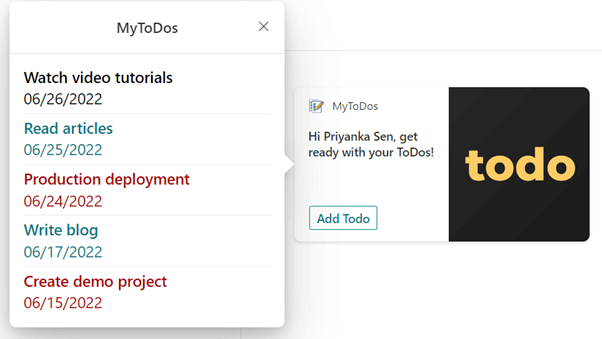
The final app will look like this:
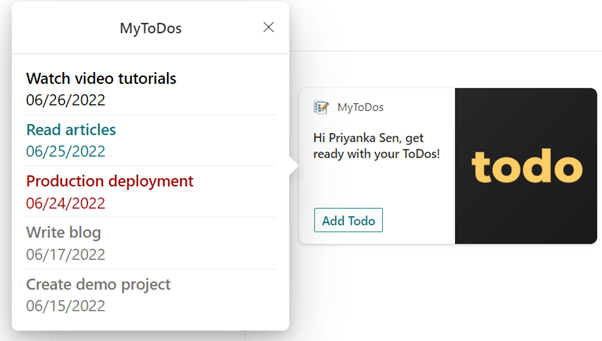
You will be able to see that the tasks have assorted colors depending on their priority.
Prerequisite
This article assumes that the developer has already created an SPFx adaptive card extension project as described in Part I. Prerequisites are the same as in Part I of this blog:
- Node: 14.18.0
- SharePoint generator: 1.14.0
Steps involved
In this article, we will follow the steps below:
- Update the SharePoint list to add the status column called IsDone.
- Create a model class.
- Update the SPServicec.ts file.
- Update interface definitions in the MyToDosAdaptiveCardExtension.ts file.
- Create a new Quickview to display a list of data.
- Update the MyToDosAdaptiveCardExtension class.
- Update the card view.
- Build and run the project.
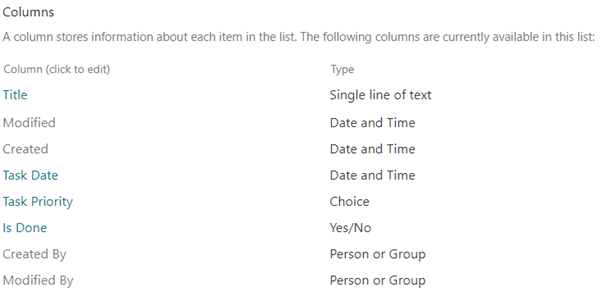
Update the SharePoint list to add the ‘Is Done’ Status column
Go to the ToDoList SharePoint list and add a new column with the internal name ‘IsDone’ and type ‘Boolean’ and a default value of ‘No.’
Create a model class
Create a model class with the name ListQueryInfo.ts so that it matches the following file structure in the project.
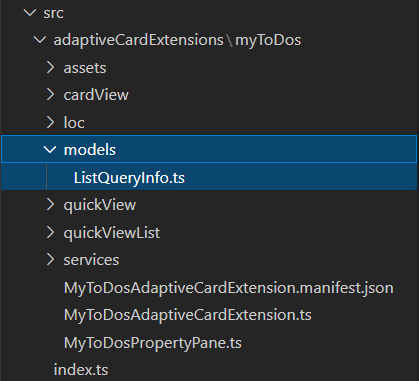
Add the following code in the ListQueryInfo.ts file:
export class ListQueryInfo {
    public recordCount: number;
    public orderByColumnName: string;
    public orderByIsAscending: boolean;
    public filterString: string;
    public selectString: string;
    public expandString: string;
    public nextRecordsPointer: any;
}
Update the SPServicec.ts file
Add the following methods at the end of the SPServicec.ts file
export const getItemsFrom = (listName: string, listQueryInfo: ListQueryInfo) => {
    return sp.web.lists.getByTitle(listName).items
        .select(listQueryInfo.selectString)
        .orderBy(listQueryInfo.orderByColumnName, listQueryInfo.orderByIsAscending)
        .filter(listQueryInfo.filterString)
        //.expand(listQueryInfo.expandString)
        .get().then((items) => {
            console.log(listName, " items: ", items);
            return items;
        }).catch(e => {
            return [];
        });
};

export const getAllItemsFrom = (listName) => {
    return sp.web.lists.getByTitle(listName).items.top(4999).select('*').get();
};
export const getCurrentUser = () => {
    return sp.web.currentUser.get();
};

export const updateListItem = (listname: string, id: any, updatedData: any): Promise<any> => {
    return sp.web.lists.getByTitle(listname).items.getById(id).update(updatedData);
};
Update interface definitions in the MyToDosAdaptiveCardExtension.ts file
Go to the MyToDosAdaptiveCardExtension.ts file and add the IToDo interface after the imports section and above other interfaces.
export interface IToDo {
  title: string;
  TaskDate: string;
  TaskPriority: string;
  IsDone: boolean;
  id: number;
  textColor: string;
}
Replace IUserInfo interface with the following code
export interface IUserInfo {
  id: number;
  name: string;
  jobTitle: string;
  pictureUrl: string;
  email: string;
}
Replace the state and props interfaces as follows
export interface IMyToDosAdaptiveCardExtensionProps {
  title: string;
  getToDoList: any;
}

export interface IMyToDosAdaptiveCardExtensionState {
  userInfo:IUserInfo;
  priorityOptions: IOption[];
  todoList: IToDo[];
}
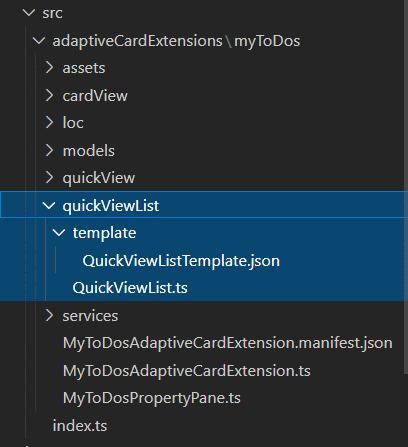
Create a new Quickview to display list data
Folder structure for Quickview
Create QuickViewListTemplate.json and QuickViewList.ts files that project structure math as follows:
Update QuickViewList.ts
Now go to QuickViewList.ts and add the following code:
import { ISPFxAdaptiveCard, BaseAdaptiveCardView, IActionArguments } from '@microsoft/sp-adaptive-card-extension-base';
import * as strings from 'MyToDosAdaptiveCardExtensionStrings';
import { IMyToDosAdaptiveCardExtensionProps, IMyToDosAdaptiveCardExtensionState, IOption, IToDo } from '../MyToDosAdaptiveCardExtension';
import { updateListItem } from '../services/SPServices';

export interface IQuickViewData {
  subTitle: string;
  title: string;
  priorityOptions: IOption[];
  todoList: IToDo[];
}

export class QuickViewList extends BaseAdaptiveCardView<
  IMyToDosAdaptiveCardExtensionProps,
  IMyToDosAdaptiveCardExtensionState,
  IQuickViewData
> {
  public get data(): IQuickViewData {
    const { todoList, priorityOptions } = this.state;
    return {
      subTitle: strings.SubTitle,
      title: strings.Title,
      priorityOptions,
      todoList
    };
  }

  public get template(): ISPFxAdaptiveCard {
    return require('./template/QuickViewListTemplate.json');
  }
  public onAction(action: IActionArguments): void {
    console.log("action",action);
    let { todoList, userInfo } = this.state;
    if (action["type"] === 'Submit') {

      const { id,newIndex } = action["data"];
      let selectedItem = todoList[newIndex];
      console.log("selectedItem",selectedItem);
      let updatedValue = !selectedItem.IsDone;
      selectedItem.IsDone = updatedValue;
      let updatedData = { IsDone: updatedValue };
      let itemId = selectedItem.id;

      if (id === 'selectAction') {

        updateListItem('ToDoList',itemId,updatedData).then(resp=>{
          console.log("resp ",resp);
          this.properties.getToDoList(userInfo.id);
        }).catch(e=>{
          console.log("error ",e);
        });
      }
    }
  }
}
Update QuickViewList template
Next, add the following code in QuickViewListTemplate.json.
{
  "schema": "http://adaptivecards.io/schemas/adaptive-card.json",
  "type": "AdaptiveCard",
  "version": "1.2",
  "body": [
    {
      "type": "ColumnSet"
    },
    {
      "type": "Container",
      "$data": "${todoList}",
      "selectAction": {
          "type": "Action.Submit",
          "data": {
              "id": "selectAction",
              "newIndex": "${$index}"
          }
      },
      "separator": true,
      "items": [
          {
              "type": "ColumnSet",
              "columns": [
                  {
                      "type": "Column",
                      "width": "stretch",
                      "items": [
                        {
                            "type": "TextBlock",
                            "text": "**${title}**",
                            "color": "${textColor}",
                            "size": "Medium",
                            "wrap": true,
                            "maxLines": 2,
                            "spacing": "None"
                        },
                        {
                          "type": "TextBlock",
                          "text": "${TaskDate}",
                          "color": "${textColor}",
                          "size": "Medium",
                          "wrap": true,
                          "maxLines": 2,
                          "spacing": "None"
                        }
                      ]
                  }
              ]
          }
      ]
}
  ]
}
Update the MyToDosAdaptiveCardExtension class
Step 1:
Go to the MyToDosAdaptiveCardExtension.ts file. Add the following import statements after the existing import statements.
import { QuickViewList } from './quickViewList/QuickViewList';
import { getCurrentUser, getItemsFrom } from './services/SPServices';
import { ListQueryInfo } from './models/ListQueryInfo';
import * as moment from 'moment-timezone';
Step 2:
Find the following line:
export const QUICK_VIEW_REGISTRY_ID: string = 'AddToDos_QUICK_VIEW';Add the following code after the above line.
export const QUICK_VIEW_LIST_REGISTRY_ID: string = 'MyToDos_QUICK_VIEW_list';Step 3:
Replace the OnInit method with the following code.
public onInit(): Promise<void> {

    this.cardNavigator.register(CARD_VIEW_REGISTRY_ID, () => new CardView());
    this.quickViewNavigator.register(QUICK_VIEW_REGISTRY_ID, () => new QuickView());
    this.quickViewNavigator.register(QUICK_VIEW_LIST_REGISTRY_ID, () => new QuickViewList());

    sp.setup({
      spfxContext: this.context
    });

    this.properties.getToDoList = this.getToDoList;

    let userInfo: IUserInfo = {
      id: -1,
      name: "",
      jobTitle: "",
      pictureUrl:"",
      email: "",
    };
    let priorityOptions: IOption[] = [];

    this.state = {
      userInfo,
      priorityOptions,
      todoList: []
    };

    getCurrentUser().then((user) => {
      console.log("curruser",user);
      userInfo.id = user.Id;
      getUserProfileInfo().then(resp=>{
        console.log("resp",resp);
        if(resp){
          userInfo.name = resp.DisplayName;
          userInfo.email = resp.Email;
          userInfo.jobTitle = resp.Title;
          userInfo.pictureUrl = resp.PictureUrl;
          this.setState({
            userInfo,
          });
        }
        getListFieldChoices('ToDoList','TaskPriority').then(choiceResp=>{
          console.log("choiceResp",choiceResp);
          if(choiceResp && choiceResp.Choices && choiceResp.Choices.length>0){
            priorityOptions = choiceResp.Choices.map(item=>{
              return {
                title: item,
                value: item
              };
            });
          }
          this.setState({
            priorityOptions
          });
        }).catch(e=>console.log(e));

        this.getToDoList(userInfo.id);

      }).catch(e=>console.log(e));

    });

    return Promise.resolve();
  }
Step 4:
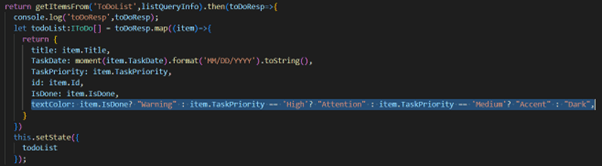
Add the following function after the OnInit method:
private getToDoList = (userId) => {
    let listQueryInfo: ListQueryInfo = new ListQueryInfo();
    listQueryInfo.recordCount = 4999;
    listQueryInfo.selectString = "*";
    listQueryInfo.filterString = `AuthorId eq ${userId}`;// and TaskPriority eq 'Medium'//
    listQueryInfo.expandString = "Author";
    listQueryInfo.orderByColumnName='TaskDate';
    listQueryInfo.orderByIsAscending=false;

    return getItemsFrom('ToDoList',listQueryInfo).then(toDoResp=>{
      console.log('toDoResp',toDoResp);
      let todoList:IToDo[] = toDoResp.map((item)=>{
        return {
          title: item.Title,
          TaskDate: moment(item.TaskDate).format('MM/DD/YYYY').toString(),
          TaskPriority: item.TaskPriority,
          id: item.Id,
          IsDone: item.IsDone,
          textColor: item.IsDone? "Warning" : item.TaskPriority == 'High'? "Attention" : item.TaskPriority == 'Medium'? "Accent" : "Dark",
        }
      })
      this.setState({
        todoList
      });
    }).catch(e=>console.log(e));
  }
Update the card view.
Go to the CardView.ts file. Add the following import statement:
import { QUICK_VIEW_LIST_REGISTRY_ID } from '../MyToDosAdaptiveCardExtension';Add the onCardSelection function as follows:
public get onCardSelection(): IQuickViewCardAction | IExternalLinkCardAction | undefined {
    return {
      type: 'QuickView',
      parameters: {
        view: QUICK_VIEW_LIST_REGISTRY_ID
      }
    };
  }
Build and run
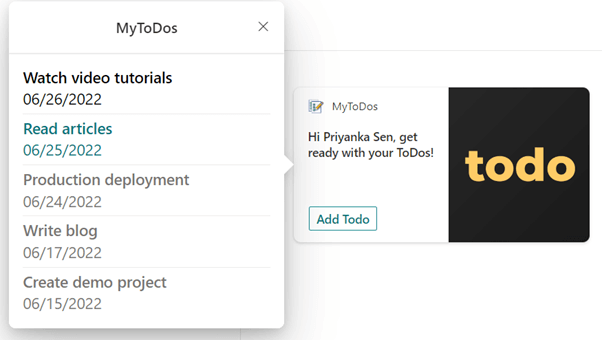
I hope you have added some tasks using the Add ToDo button in the card view. Now build the application and run it to see how it looks.
If you click on any of the rows, you will see that the color of the task gets changed. This is because we have added an action on row selection that updates the IsDone column for that row to true and to display completed tasks, we have used a different color.
Bonus Points
Dynamic Text Color
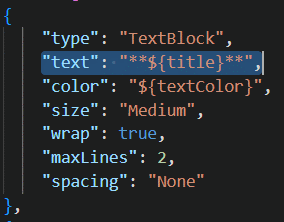
Dynamic color to a TextBlock can be added by passing a string variable to the color property of the TextBlock in the template file and updating the value of that string variable in your code. Find the following code in the QuickViewListTemplate.json file:
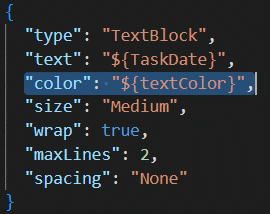
Here you can see that the textColor variable is used to set the color of the TextBlock. Now, go to the MyToDosAdaptiveCardExtension.ts file and see the getToDoList function and see that its value is set depending on IsDone and TastPriority field as follows.
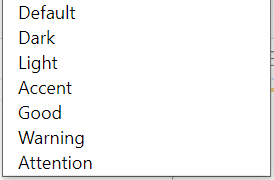
The following colors can be set to a TextBlock:
Bold Text
To have a bold text in a TextBlock, pass the value of the text property within 2 sets of 2 consecutive asterisks. For e.g., ** <your text>**. Find the following code in the QuickViewListTemplate.json file and check.
Conclusion:
We hope you found this blog useful in understanding how to fetch data from a SharePoint list and display it in quick view and how to update the data. Please reach out to us so that we can put our decades of experience and expertise in Microsoft technologies to help your organization’s Digital Transformation journey.